pico
Raspberry Pi Pico Reset Button Hack
In this video and article we show you how to wire up a reset button onto your Raspberry Pi Pico so that you no longer have to unplug the Pico each time you want to reset it.
Video
Overview
A quick and easy project or hack so that you don't have to keep unplugging your Pico each time you want to reset it. After this little hack all you will have to do is hold down the reset button and the Pico is reset. As a bonus if you hold down the button on the Pico and the reset button, release the reset button and then release the button on the Pico it will take you to the boot loader.
Equipment
- 1 x Raspberry Pi Pico
- 1 x Momentary Switch
- Jumper wires
- 1 x breadboard
The Circuit
We take a clean breadboard, add a Raspberry Pi Pico and put the switch onto the breadboard. Now to wire it up.
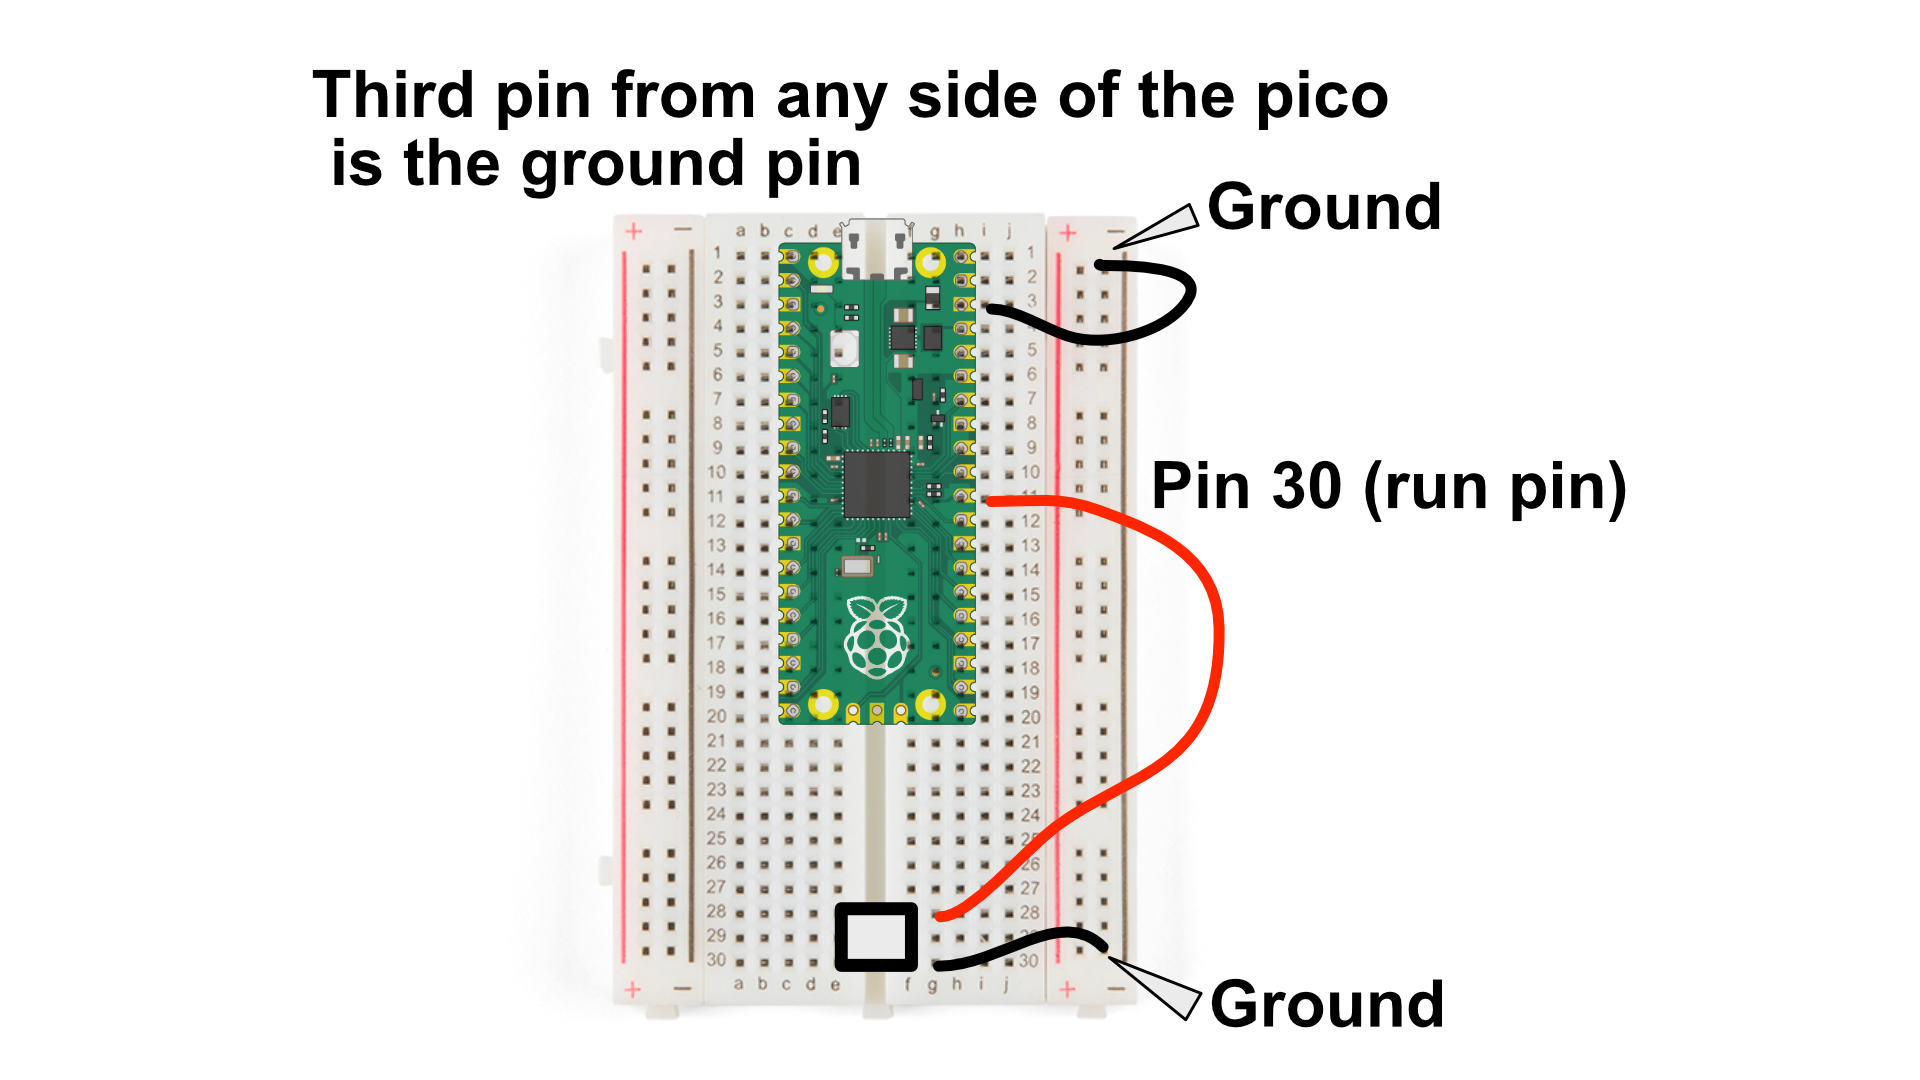
Step 1: Adding wires to ground
The third pin from any side of the Pico is ground, so we add a wire to the third pin on the pico and to ground.
Step 2: Connect the switch to ground
Using another wire connect one side of your switch to ground as well.
Step 3: Connect the switch to the run pin
We connect Pin 30 on the Pico which is the run Pin to the other side of the switch.
Tip: Pin 21 is the end pin of the Pico so to know where pin 30 is we can count up to 30 from the bottom of the Pico.

