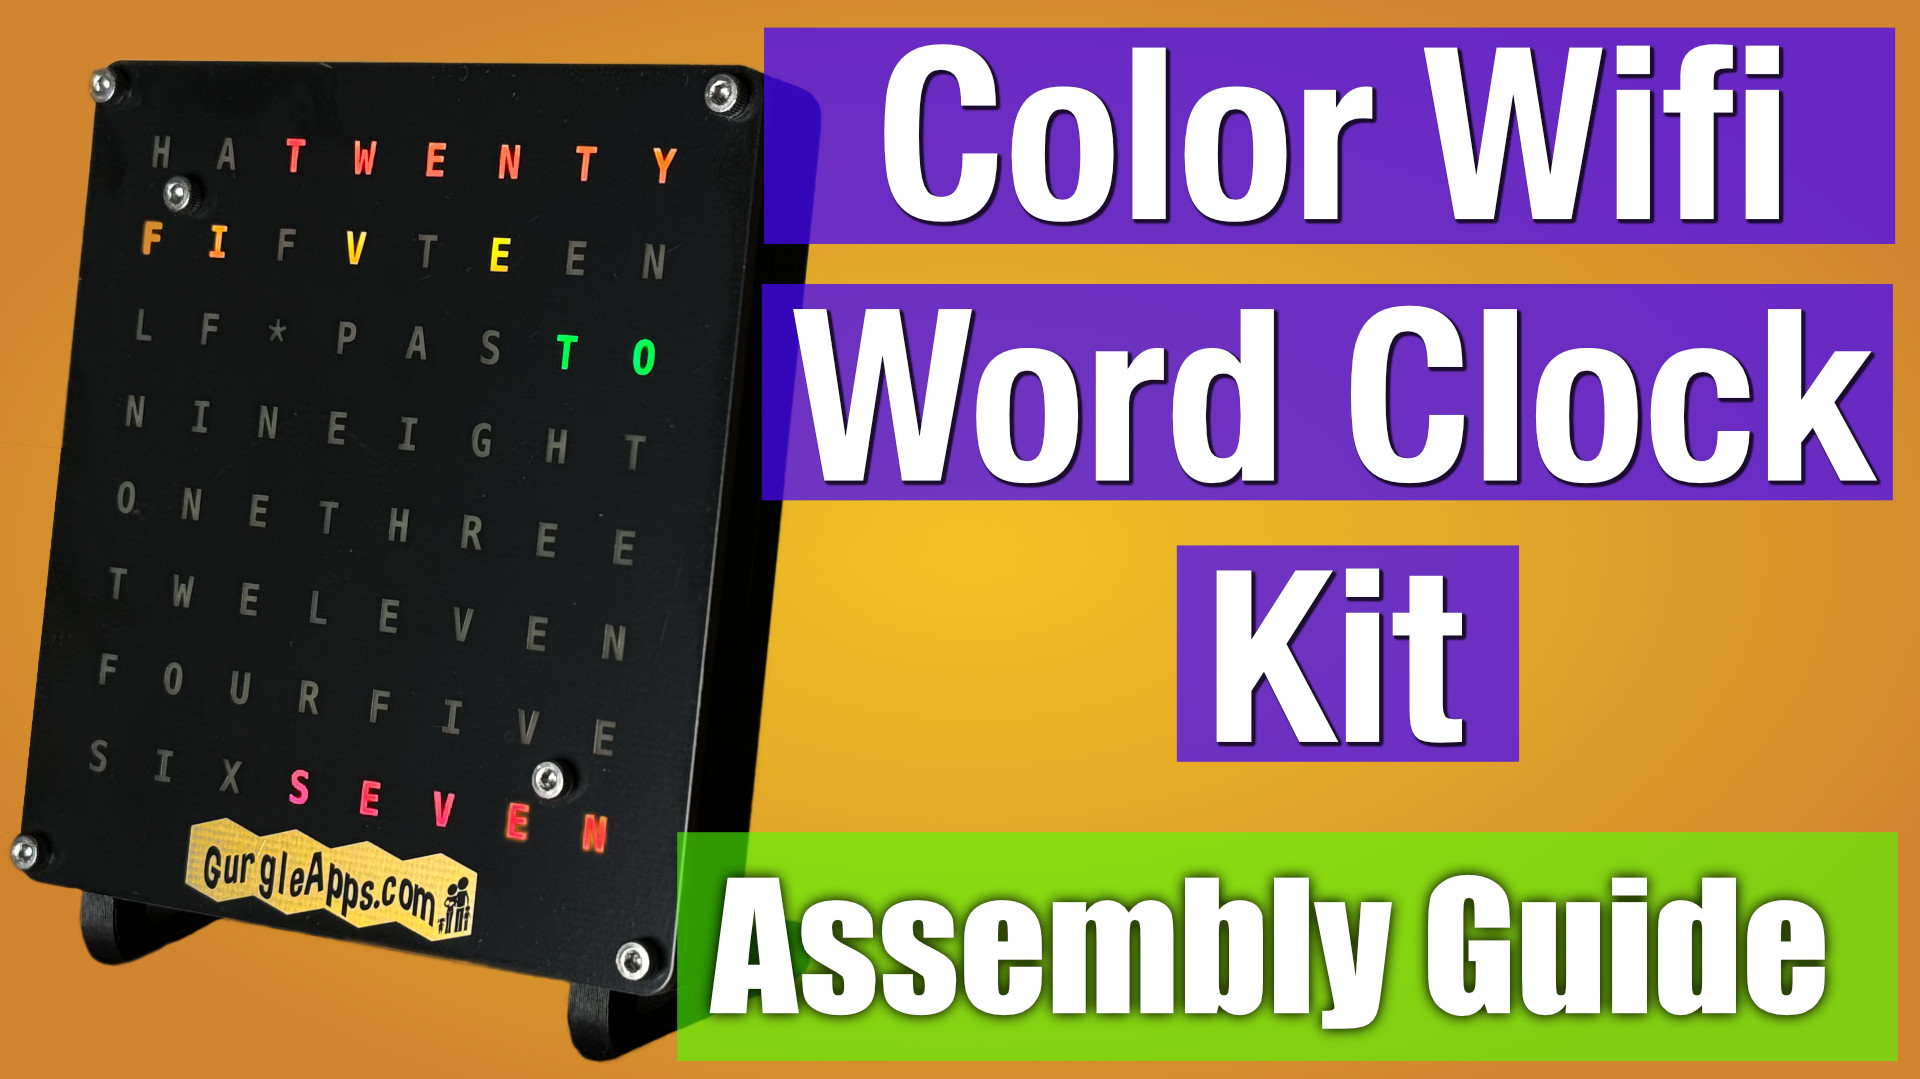
projects
Software Setup: Configuring Your Wifi Word Clock
Welcome to our step-by-step guide on setting up the software for your WiFi-controlled Word Clock. Whether you've just pieced together your clock or are diving straight into the software, you're about to bring your creation to life in a few simple steps. Ready to get started?
If you're looking for the assembly instructions, follow this link to get started.

- Full Video
- Step 1: Flashing The MicroPython Firmware
- Step 2: Get The Word Clock Code
- Step 3: Put The Code Onto The MicroController
- Step 4: Run The Code
- Step 5: Connect To The Word Clock Admin
- Step 6: Control The Word Clock
- Seamless WiFi Integration
- Clock Customizations
- About Color Customization
- Time Zones and Daylight Saving Time
- Congratulations
Full Video
Watch our comprehensive video tutorial below, where we guide you through every step of the software setup from start to finish. Perfect for visual learners!
Step 1: Flashing The MicroPython Firmware
Flashing MicroPython onto your Raspberry Pi Pico W is the first step for your WiFi Word Clock setup. We've chosen Thonny for its straightforward approach, but feel free to use any method you're comfortable with.
-
Download Thonny: Head over to Thonny's official website and grab the version for your operating system (Windows, Mac, Linux).
-
Enter Bootloader Mode: Press and hold the BOOTSEL button on your Pico while connecting it to your computer. Once connected, release the button. Your device should appear as a removable drive, usually named RPI-RP2.
-
Flash MicroPython Using Thonny:
- Open Thonny and select Run > Configure interpreter.
- Choose MicroPython (Raspberry Pi Pico) from the interpreter options and set the port to auto-detect.
- Click Install or update firmware. In the firmware installation window:
- For Target Volume, ensure your Pico's drive is selected.
- Under MicroPython family, choose RP2.
- Select Raspberry Pi . Pico 2W or Raspberry Pi Pico W / Pico WH depending on which microcontroller you have for the variant, then pick the latest version and hit install. Lately we have been shipping the newer Pico 2W microcontrollers.
Note: This is our preferred method, but MicroPython can be installed in different ways. Feel free to explore other methods if you're familiar with them. The key is to get MicroPython running on your Pico W.
Step 2: Get The Word Clock Code
Follow this link to go the the Word Clock GitHub repo and there should be a green button/dropdown to download the ZIP file. One that is downloaded unzip the files.
You've just taken a big step towards bringing your word clock to life by obtaining the code. Great job!
Step 3: Put The Code Onto The MicroController
Now that you've got the code, the next step is transferring it to your microcontroller and adjusting the config.json file if necessary.
-
Optional Config Adjustment: You can skip this step. It's here for customization enthusiasts ready to tailor their experience right out of the gate.
The project uses
config.jsonas the main configuration file. You'll find other example configs, such asconfig_esp32-c3.jsonandconfig_wifi.json, which are tailored for different microcontrollers or LED matrices. If you're using an alternative setup or wish to connect to your WiFi network immediately:- Choose the appropriate config file for your setup and rename it to
config.json, replacing the original file. - To connect to WiFi directly, edit
config_wifi.jsonwith your WiFi SSID and password before renaming it.
- Choose the appropriate config file for your setup and rename it to
-
Transfer the Code: Don't skip this step!
- With Thonny open and your Pico connected, navigate to the folder where you unzipped the Word Clock code.
- Inside the
srcfolder, select all.pyand.jsonfiles, as well as thewwwfolder. - Right-click and choose Upload to /. Thonny will copy the files to your Pico.
Don't worry if this sounds a bit technical. This step ensures your word clock operates correctly and connects to your network. Congratulations, you're almost ready to see your word clock in action!
Step 4: Run The Code
You could just unplug and plug the word clock back in to run the code, but seeing as we use using Thonny we can double click main.py and click the green run button.
This way you get to see all the console output.
The Word Clock should show a little animation to show it's working.
Running the code for the first time is a magical moment. Feel free to play around with the settings later to truly make the word clock your own.
Step 5: Connect To The Word Clock Admin
The Word Clock operates with dual WiFi modes: it can connect to your home network while also maintaining its own access point. This dual-mode ensures you can always directly manage your clock, even if it disconnects from your home network.
- Initial Connection: Begin by connecting any WiFi-enabled device to the
gurgleappsnetwork, using the passwordgurgleapps. - Access the Admin Panel: With your device connected to the Word Clock's network, navigate to http://192.168.4.1 in your web browser to access the control panel.
From here, you can dive into customization, from adjusting settings to personalizing your clock's appearance.
Important: Even after setting up your home WiFi connection, if the Word Clock detects an issue with the Wi-Fi it will bing up it'a access point. This feature ensures you can always manage your clock directly, providing a fail-safe access route.
Step 6: Control The Word Clock
Now that your Word Clock is accessible via its admin panel, you have full control over its customization and settings.
Seamless WiFi Integration
To integrate the clock with your home WiFi:
- In the control panel, find the Wi-Fi tab.
- Fill in your WiFi network's SSID and Password, then press Update Wifi.
- Give it a moment to connect and watch the clock scroll the ip address.
Note: Capture the IP address displayed; it's your key to accessing the clock on your home network. If issues arise, verify your WiFi details, and if needed, try the setup process again after rebooting the clock. The ip address is also scrolled and flashed whenever the Word Clock is turned on and connected to WiFi.
- Now disconnect from the gurgleapps WiFi access point and connect to your own WiFi network. Your Word Clock admin will be accessible from the ip you noted down.
Clock Customizations
The Word Clock is all about reflecting your style. Let's explore:
- Setting the Time: Use the DateTime picker in the Clock Settings tab, then click Update. If your region changes its clocks seasonally, you may need to adjust it again when Daylight Saving Time starts or ends.
- Brightness: Adjust the brightness slider to your liking and click Update. It's instantly brighter or dimmer, based on your preference.
- Display Modes: Choose from Single Colour, Rainbow, or Word Colours modes. Each offers a unique way to display the time.
- Colour Customization: Whether you're setting a single hue or assigning colors to specific words, the control panel offers intuitive options to select your desired palette.
The customization possibilities are vast, encouraging you to experiment and find the perfect setup for your space.
About Color Customization
Your Word Clock comes with the ability to display a wide range of colors, offering you the opportunity to match it with your mood, the season, or just for fun! We've carefully selected a set of color swatches—preset colors that we found look great on the clock's LED matrix.
Why Presets? We understand the excitement of mixing your own colors, and we encourage you to experiment. However, it's worth noting that the outcome of custom color mixes might not always align with your expectations. This isn't a flaw in your Word Clock or its LEDs but rather a characteristic of working with RGB LEDs combined with variable brightness levels.
Here's the Science Bit: The perceived color of RGB LEDs can vary widely depending on factors like brightness, the color and material of the surrounding case, and even the ambient light in the room. Plus, without gamma correction (a process we're exploring to improve in future updates), some colors might not blend or appear as you might expect on a computer screen or more sophisticated displays.
Our Advice? Start with the preset swatches we've included—they're optimized to look great on your Word Clock. Feel free to dive into creating your own colors, but remember, the adventure is in the experimentation. If your custom color doesn't come out quite as planned, consider it a step in the journey of learning and exploration with your new clock.
Time Zones and Daylight Saving Time
Your Word Clock keeps accurate time by syncing with internet time servers, then applying a UTC offset to show your local time.
You might be wondering why the clock uses a UTC offset instead of automatically handling every time zone and daylight saving rule in the world. The short answer is that true automatic time zone support usually relies on the IANA time zone database, which is the same large database used by computers, phones, and servers to handle regional clock changes correctly.
On a small MicroPython device, embedding the full IANA time zone database would add significant complexity and use valuable storage and memory. For a compact WiFi clock, that tradeoff is not ideal.
Instead, the Word Clock uses a simpler and more reliable approach:
- It syncs the current UTC time from the internet.
- It applies a user-configured UTC offset for your location.
- If your region uses Daylight Saving Time or Summer Time, you may need to update the offset when the clocks change.
This approach keeps the software lightweight, dependable, and easy to maintain while still giving you accurate local time.
Congratulations
Congratulations on setting up your WiFi Word Clock! You've navigated through the technical setup, and now it's time to enjoy the fruits of your labor. Don't forget to share your experience, insights, or even a photo of your finished clock with our community. Your journey might just inspire the next maker. Thank you for choosing GurgleApps, we are thrilled to have you on board. It took over a year to produce something we were proud enough to sell, and we went through dozens of prototypes before we were ready.