projects
Pico Web Server: Control Your Raspberry Pi Pico Projects from Any Device
Hey there, fellow makers! We're a group of three siblings who love tinkering with screens, knobs, and buttons to control our Raspberry Pi Pico projects. But today, we have an awesome solution for you: a slick, browser-based user interface that lets you control your projects remotely, from any device with a web browser, including smartphones, tablets, and computers.
We've done the grunt work, so you can grab our code and be up and running in minutes. This was developed for the Pico W but should work on other MicroPython-compatible devices we've tested on ESP8266 and ESP32.
It takes just one line of code to call one of your MicroPython functions from a web address. Our example code has a function set_blink_pattern for the LED but this could be any function.
server.add_function_route(
    "/set-blink-pattern/<on_time>/<off_time>",
    set_blink_pattern
)
With this code, all you need to do is type in a web address with the desired values for on_time and off_time, and the function set_blink_pattern will be called with those values. It's that simple!
- What Can It Do
- Video Demonstration
- Serve Web Pages
- Run Your Python Functions From A Web Browser
- Blinking IP Address Feature
- Dynamic Web Pages
- Setting Up
- Serve Your Own Static Pages
- Creating a Simple Page with Dynamic Content
- Frontend Design
- Adding GurgleApps Webserver to Your Existing Project
- Advanced Use
- Contribute and Help The Community
- Final Words
What Can It Do
Our code offers a range of features and capabilities that will enhance your Raspberry Pi Pico projects.
Video Demonstration
The brief demo video shows a Web Page controlling the LED and shows what is happening behind the scenes.
Serve Web Pages
Simply put static web pages onto your Pico by copying over the files, and your Pico will serve them. HTML, Images, CSS, etc.
Run Your Python Functions From A Web Browser
You can call one of your python functions from a web page, and even pass it parameters. Set the colours for an LED or text to show on a scrolling matrix. The possibilities are endless.
Blinking IP Address Feature
This feature is incredibly useful when you have no screen or computer available.
Watch the video demonstration below to see the blinking IP address feature in action. By setting BLINK_IP and BLINK_LAST_ONLY options in config.py, you can configure the Pico to blink its IP address using the built-in LED.
Dynamic Web Pages
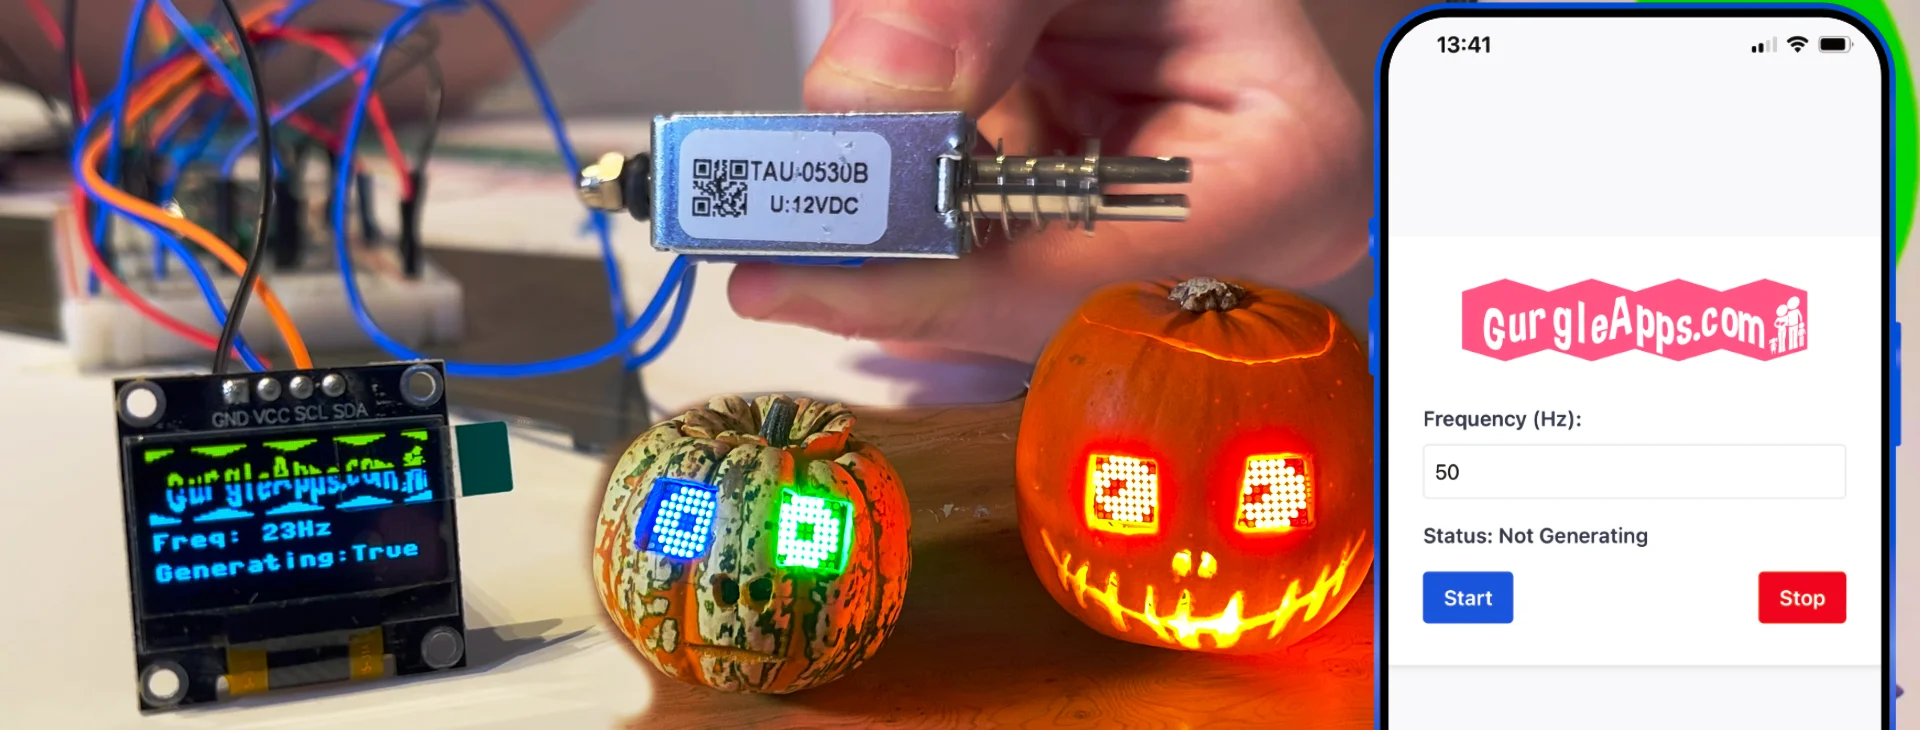
Generate dynamic web pages from the server and modify their content, such as incorporating live data from sensors attached to your Pico, to create interactive web pages.
Setting Up
Make sure you have MicroPython on your Pico, then grab the code from our GitHub repo and copy it to your Pico.
You'll need to edit config.py to put your Wi-Fi details and blink options:
WIFI_SSID = "your_wifi_ssid"
WIFI_PASSWORD = "your_wifi_password"
BLINK_IP = False
BLINK_LAST_ONLY = False
When you run main.py, you will see a lot of information, but look for a line that says point your browser to http://<YOUR_PICO_IP>, which will provide the address of your web server.
(Your address will be different from the <YOUR_PICO_IP> but this in this article; you will replace it with your own IP your pico has reported without the angled brackets <> something like 192.168.1.100)
Bundled Demo Project
A good starting point is visiting http://<YOUR_PICO_IP>/led.html which will load a web page that allows you to stop and start the onboard LED flashing. You can also change the delay, type in something like 0.1, and press start.
The code we use to call the set_delay function when a browser hits the server is just one line.
server.add_function_route("/set-delay/<delay>", set_delay)
The page uses JavaScript to hit that page in the background, but if you want to hack it, then visit http://<YOUR_PICO_IP>/set-delay/0.1 or http://<YOUR_PICO_IP>/set-delay/0.5
Remember to replace http://<YOUR_PICO_IP> with the IP given by your Pico.
By providing this example, it helps demonstrate how easy it is to create web pages that interact with your Pico functions. The server.add_function_route allows you to define custom routes that trigger your functions, and JavaScript in the web page can make requests to those routes to update your Pico's behavior in real-time.
Serve Your Own Static Pages
In our repository, you'll find a www folder, which you will have copied to your Pico. Simply add your own HTML files to this folder to serve your custom static pages.
Creating a Simple Page with Dynamic Content
You can run any of your own python functions. Lets look at a simple page that says hello. Go to http://<YOUR_PICO_IP>/hello/Caleb and you will get a simple web page
Hello Caleb hope you are well
http://<YOUR_PICO_IP>/hello/Amelie will give
Hello Amelie hope you are well
Lets check the code and see how this works.
Near the end of the code in main.py we have
server.add_function_route("/hello/<name>", say_hello)
This is where you can set up any route a web browser requests and have it run a function.
You pass the route as a string and then your function name. Text inside angled brackets http://<YOUR_PICO_IP>/hello/Amelie it will call the say_hello function with "Amelie".
Lets look at the say hello function.
async def say_hello(request, response, name):
    await response.send_html("Hello " + name + " hope you are well")
A one-liner, we told you this was simple. You can use this function as a template for your own.
You will always be passed a request and response, then if you used angled brackets on your route you will get one or more arguments.
To send the web page back, just use the response.send_html with your HTML as a string.
Multiple Arguments
Handling multiple arguments in a function is simple, as demonstrated in the following example code:
async def example_func(request, response, param1, param2):
    print("example_func")
    print("param1: " + param1)
    print("param2: " + param2)
    response_string = json.dumps({ "param1": param1, "param2": param2, "post_data": request.post_data})
    await response.send_json(response_string, 200)

server.add_function_route("/example/func/<param1>/<param2>", example_func)
Notice there are two arguments as there are two sets of angled brackets, you can have no arguments or many.
Sending Back Data
You can send back text and HTML as previously described but the last example sends back JSON using response.send_json.
{
   "delay":0.5,
   "status":true,
   "blink_off_time":0.5,
   "blink_on_time":0.5
}
This is useful for JavaScript to receive to make powerful web applications for your projects.
Frontend Design
We have provided the skeleton of a good-looking control panel. Along with simple JavaScript to send and receive data on input changes and button presses.
Adding GurgleApps Webserver to Your Existing Project
Integrating GurgleApps Webserver with your existing project is straightforward, allowing you to quickly enhance your Pico projects with a browser-based user interface.
Follow these steps to integrate the webserver into your project:
-
Copy the required files from the GurgleAppsWebserver project into your existing project folder.
-
Edit
config.pywith your Wi-Fi credentials and IP blink options:WIFI_SSID: Set this to your Wi-Fi network SSID (e.g.,"your_wifi_ssid")WIFI_PASSWORD: Set this to your Wi-Fi network password (e.g.,"your_wifi_password")BLINK_IP: Set this toTrueif you want the Pico to blink its IP address using the built-in LED; set it toFalseif notBLINK_LAST_ONLY: Set this toTrueif you want to blink only the last octet of the IP address; set it toFalseto blink the entire IP address
-
Update your
main.pyfile to include the necessary imports and modifications:
import config
from gurgleapps_webserver import GurgleAppsWebserver
import uasyncio as asyncio

# Add the 'async' keyword to your main function
async def main():
	# to connect to a wifi network uncomment line below
	# await server.connect_wifi(config.WIFI_SSID, config.WIFI_PASSWORD)
	while True:
		await asyncio.sleep(1)

server = GurgleAppsWebserver()
# If you want to run as an Access Point uncomment below
# server.start_access_point('my_ssid','my_password')
# You can add routes here to call your functions e.g.
# server.add_function_route("/example/func/<param1>/<param2>", example_func)
asyncio.run(server.start_server_with_background_task(main))
Keep in mind the following points when integrating the webserver into your project:
-
Most MicroPython programs have an event loop to prevent them from ending. Use the
main()function for your looping code and logic. -
If you have a loop in your code, replace any
time.sleep()calls withasyncio.sleep(). Usingasyncio.sleep()allows the webserver to continue processing requests during the sleep period, as it yields control back to the event loop, ensuring a responsive user interface. -
Add your own variables and functions as needed. To expose your functions via the webserver, use the add_function_route() method.
If you have any questions or need further assistance, feel free to reach out to us, and we'll be happy to help. Others may be glad you asked and we'll update this article.
Advanced Use
For those who are more experienced or adventurous, we've also included some advanced features in our Pico web server implementation.
Status Codes
You probably heard of 404 not found. You can send back status codes as a second argument to response.send_html and response.send_json. If you chose not to, it will send a 200 on your behalf, which means OK.
In this example, we'll show how to use a 403 Forbidden status code.
- Add a route for the custom forbidden route in your main.py:
server.add_function_route("/forbidden", forbidden_route)
- Create a function to handle the forbidden route and send the 403 status code:
async def forbidden_route(request, response):
    await response.send_html("<h1>403 Forbidden</h1>", 403)
In this example, when the server receives a request at the /forbidden route, it will call the forbidden_route function. The function sends an HTML response with a 403 Forbidden status code, indicating that the user does not have permission to access the requested resource.
You can use a similar approach to handle and send other HTTP status codes as needed.
Posting Complex Data
For more advanced users you can receive POST requests. This is where data is sent in a different way, not in the URL. Very useful for text, as you can't have spaces in a URL.
You will find the post data in request.post_data
Here's an example of how to handle a POST request:
- Add a route for the POST request in your main.py:
server.add_function_route("/submit-data", submit_data)
- Create a function to handle the POST request:
async def submit_data(request, response):
    post_data = request.post_data
    # Process the post_data as needed, e.g., store it, update variables, etc.
    await response.send_json({"status": "success", "data": post_data}, 200)
In this example, when the server receives a POST request at the /submit-data route, it will call the submit_data function. The function processes the POST data and sends a JSON response with a status message and the received data.
Contribute and Help The Community
We'd love to see your projects, control panels, and improvements. Be sure to use the Github repo and submit your additions.
Final Words
Thanks for reading! We hope you're excited to try out a browser-based user interface for your Raspberry Pi Pico projects. With the ability to serve static web pages, run Python functions from a web browser, and create dynamic web pages, the possibilities are endless. Be sure to check out our code and give it a try for yourself. And if you have any questions or run into any issues, feel free to reach out to us for help. Happy making!


