3D printing
How To Embed Magnets in a 3D Print without Glue: A Step-by-Step Guide - Bonus Guitar Pick Box
Do you want to embed components into a 3D print? Or are you looking to create a custom trinket box? Perhaps you're tired of rummaging through a jumbled mess of guitar picks. If so, this article is for you.
We will show you how to make a pick box with embedded magnets, including tips for successful embedding and ideas for customization and experimentation.
Whether you're looking to organize your picks or make a gift for a musician in your life, this tutorial will provide everything you need to know.
We are using Printables now so feel free to head over and browse our models.
You can find the models here. They give a very pleasing click and feel.
- The Old Method Using Glue
- Glue-Free Pause Print Method
- Polarity
- Results, Lessons Learned, & Final Thoughts
- Get All The Guitar Pick Box Model Files
The Old Method Using Glue
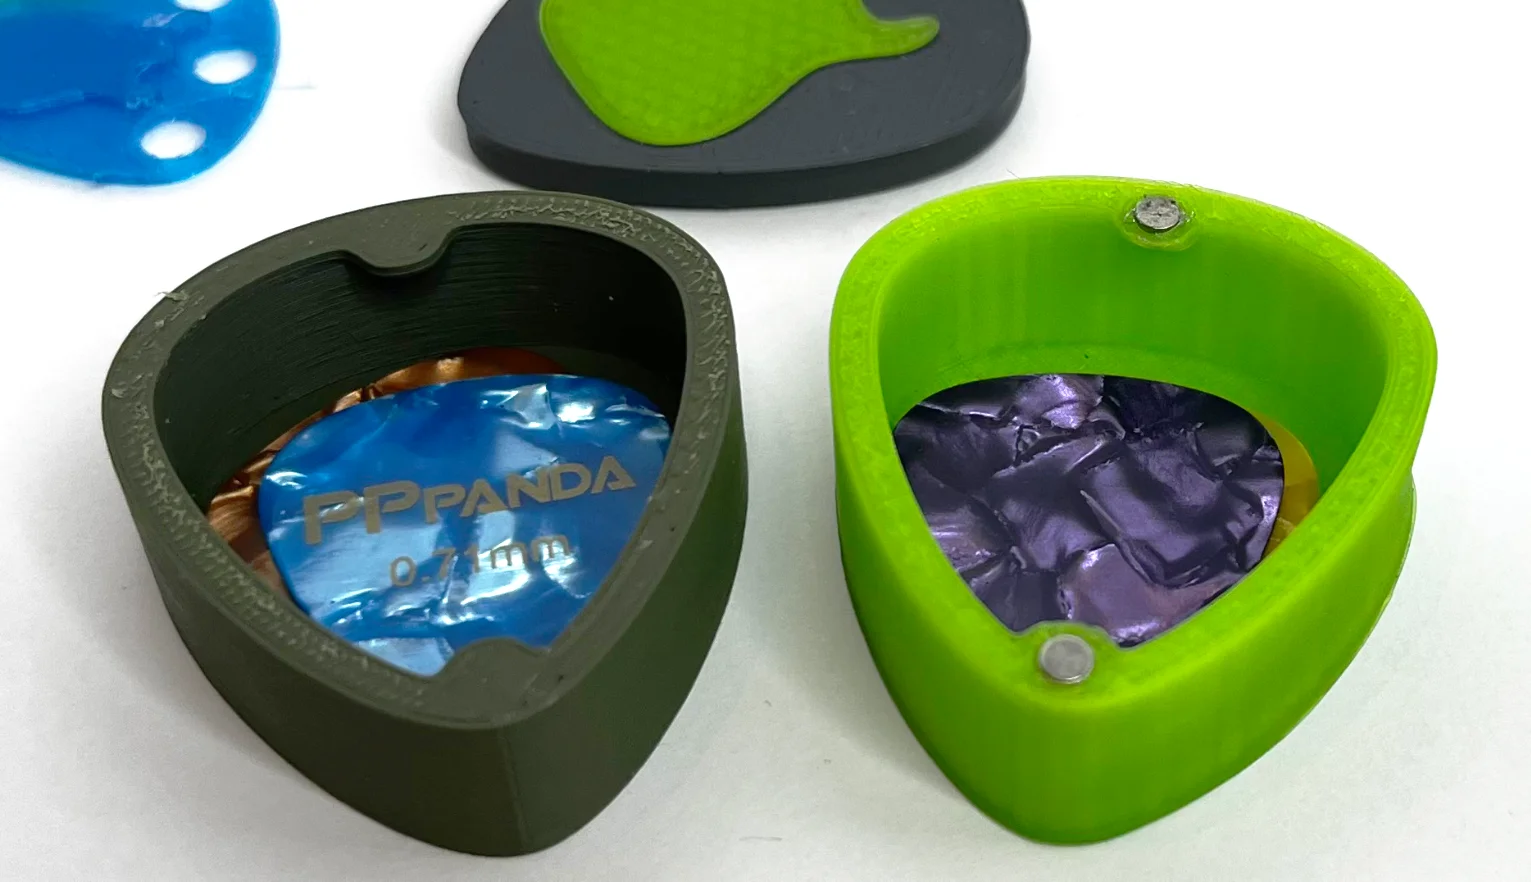
You can see both types of lids, magnets glued and exposed and embedded hence hidden.
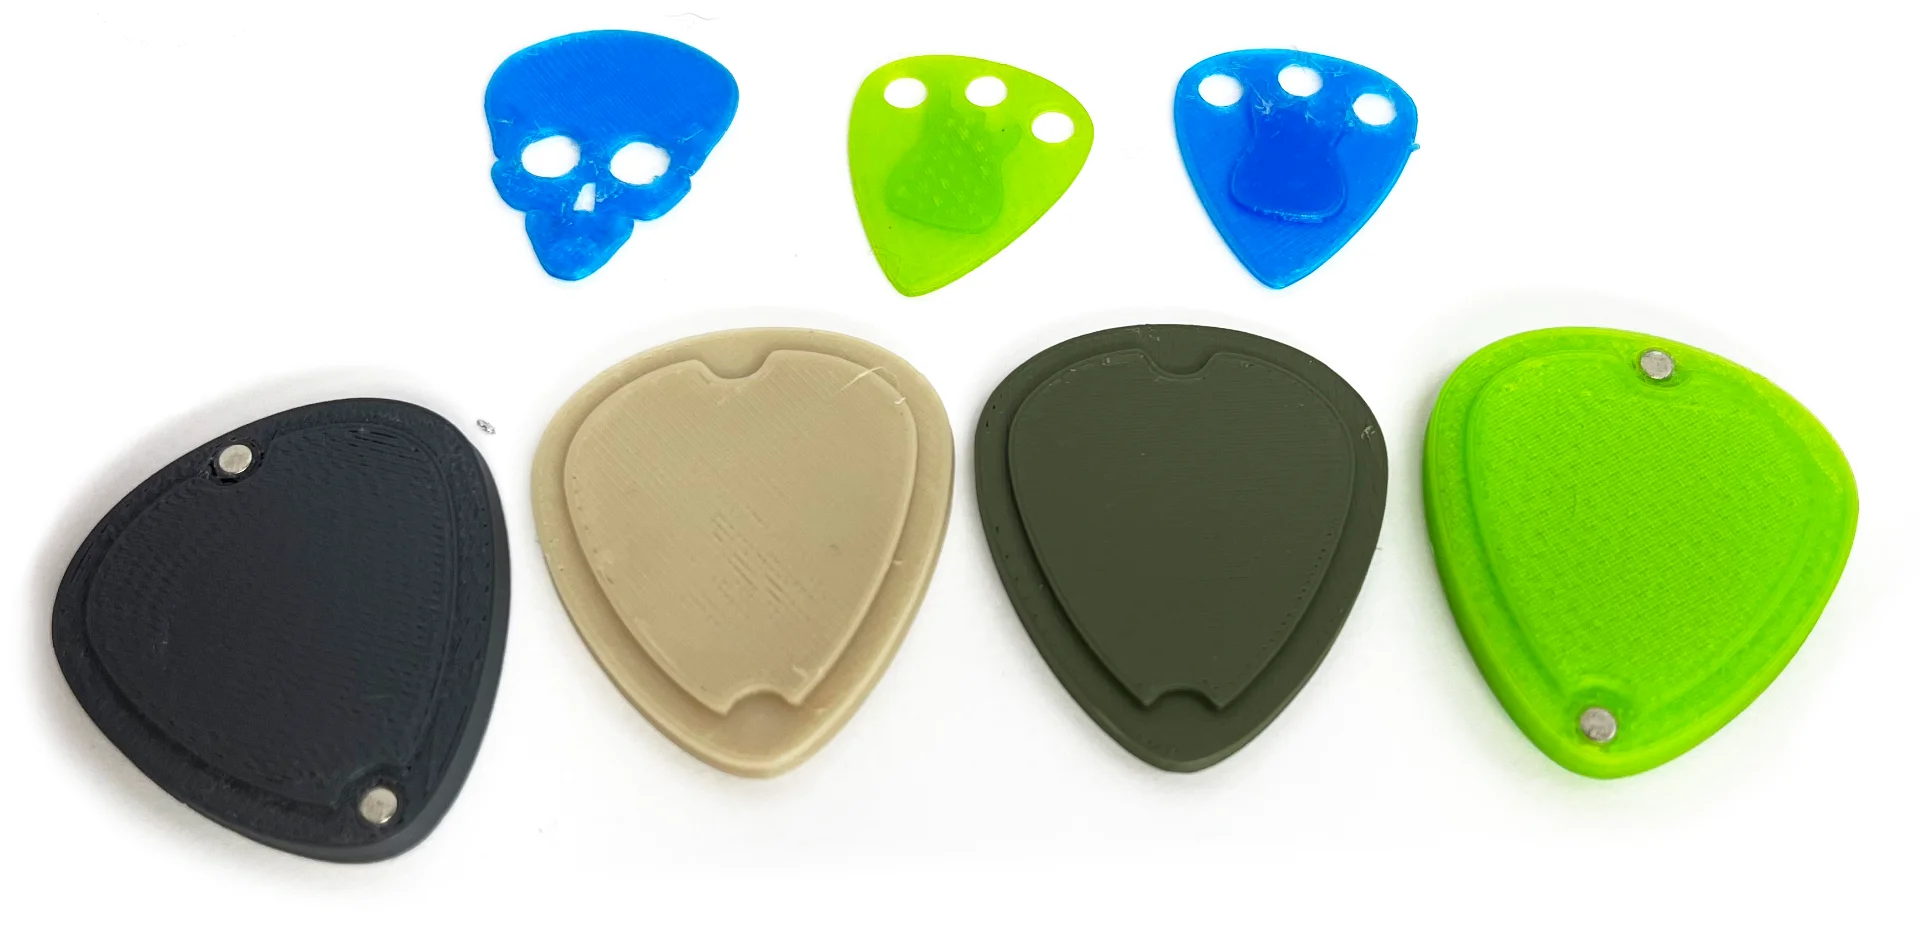
These aren't the best boxes but it's a good image to see the difference between embedded magnets versus glued ones.
In the past, we used to embed magnets into our 3D prints using glue. While this method is still effective, we have since developed a new method that doesn't require the use of glue. For the sake of completeness, here is how we used to do it:
To embed magnets into a 3D print using glue, we used the following materials:
- 3D Print or 3D Printer, Model & Filament
- Strong neodymium magnets (4 x 3mm diameter 1mm depth)
- Superglue or another strong adhesive
- Pliers
First, we designed gaps in the model where we wanted to place the magnets.
After printing, we applied a drop of superglue to each gap and used pliers to press the magnets into place.
The magnets should hold securely, but if necessary, you can use additional glue to reinforce them.
We have successfully used this method to make gifts, but we are always looking for ways to improve our processes and techniques. That's why we were excited by the idea of hiding the magnets and using the glue-free method.
Glue-Free Pause Print Method
Quick Steps
Here is the brief outline:
- Design your model with gaps where you want to place the magnets. Or download our model.
- Use your slicer software to slice the model and prepare it for printing adding a pause (GCode M601).
- During the printing process, the printer will pause ready for you to place the magnets.
- Use pliers, tweezers, or another tool to carefully place the magnets into the gaps.
- Resume the printing process and let the printer finish the job.
Step 1 Design The Model With Gaps
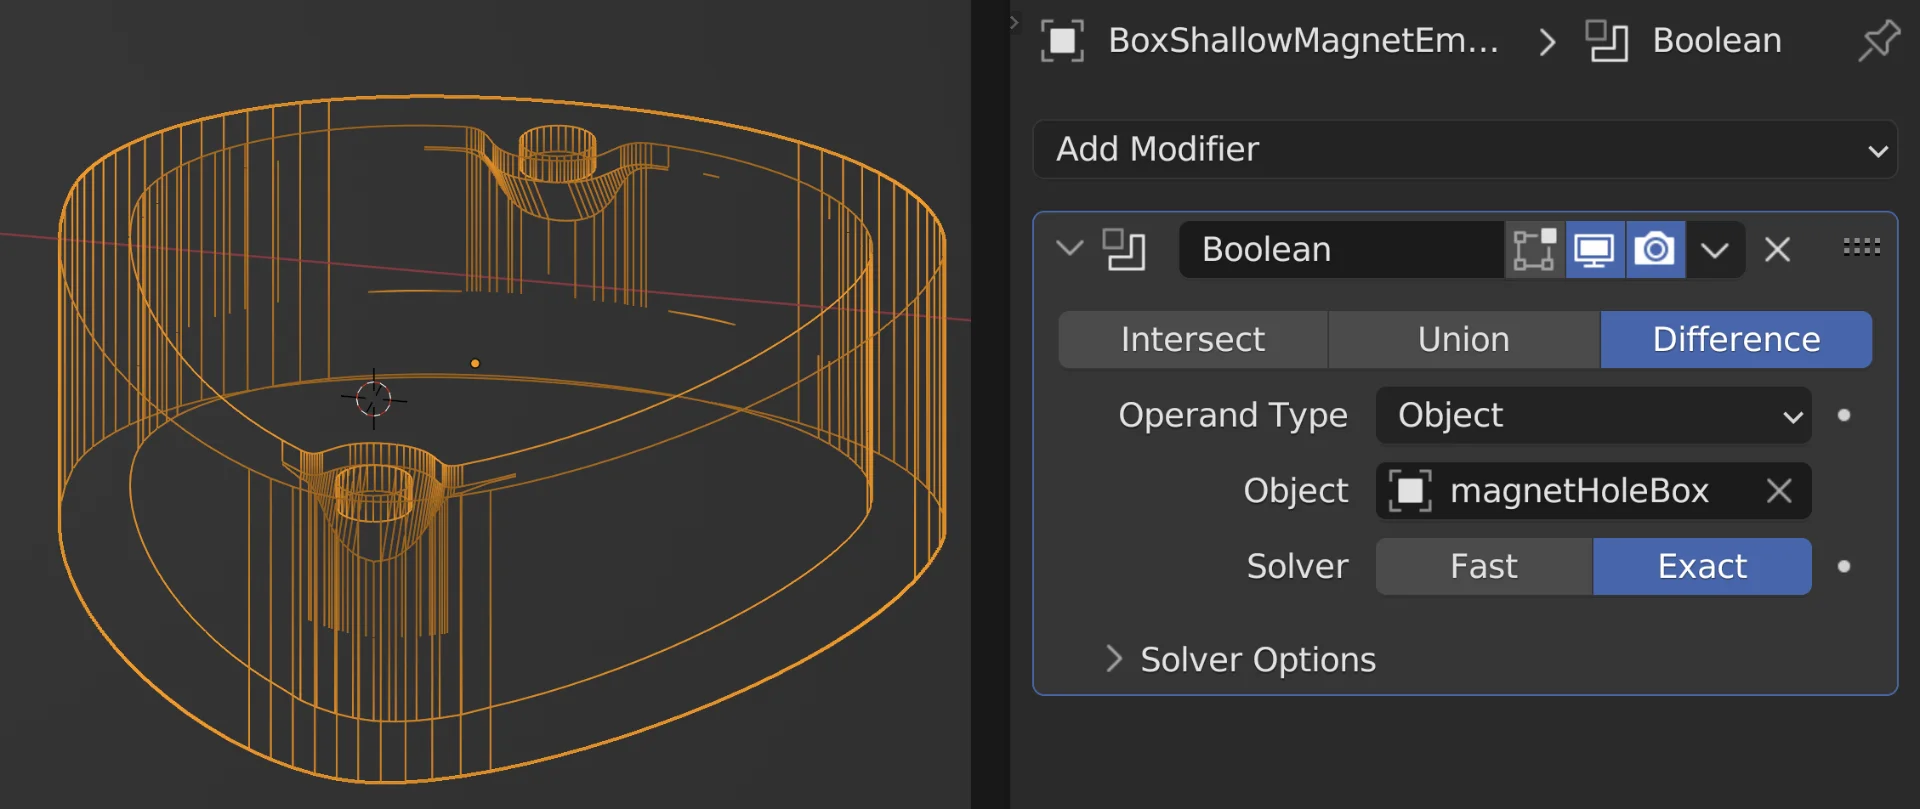
We used Blender as it's free but it doesn't matter what modeling software you used. We added a boolean modifier with 3.2mm x 1mm cylinders for the magnets.
3.2mm is slightly larger than the 3mm diameter of the magnet to make it easier to place while still on the print bed.
Step 2 - 3 Slice & Pause
We used the Prusa slicer and scrolled through the layers to find the last one before the gaps were covered.
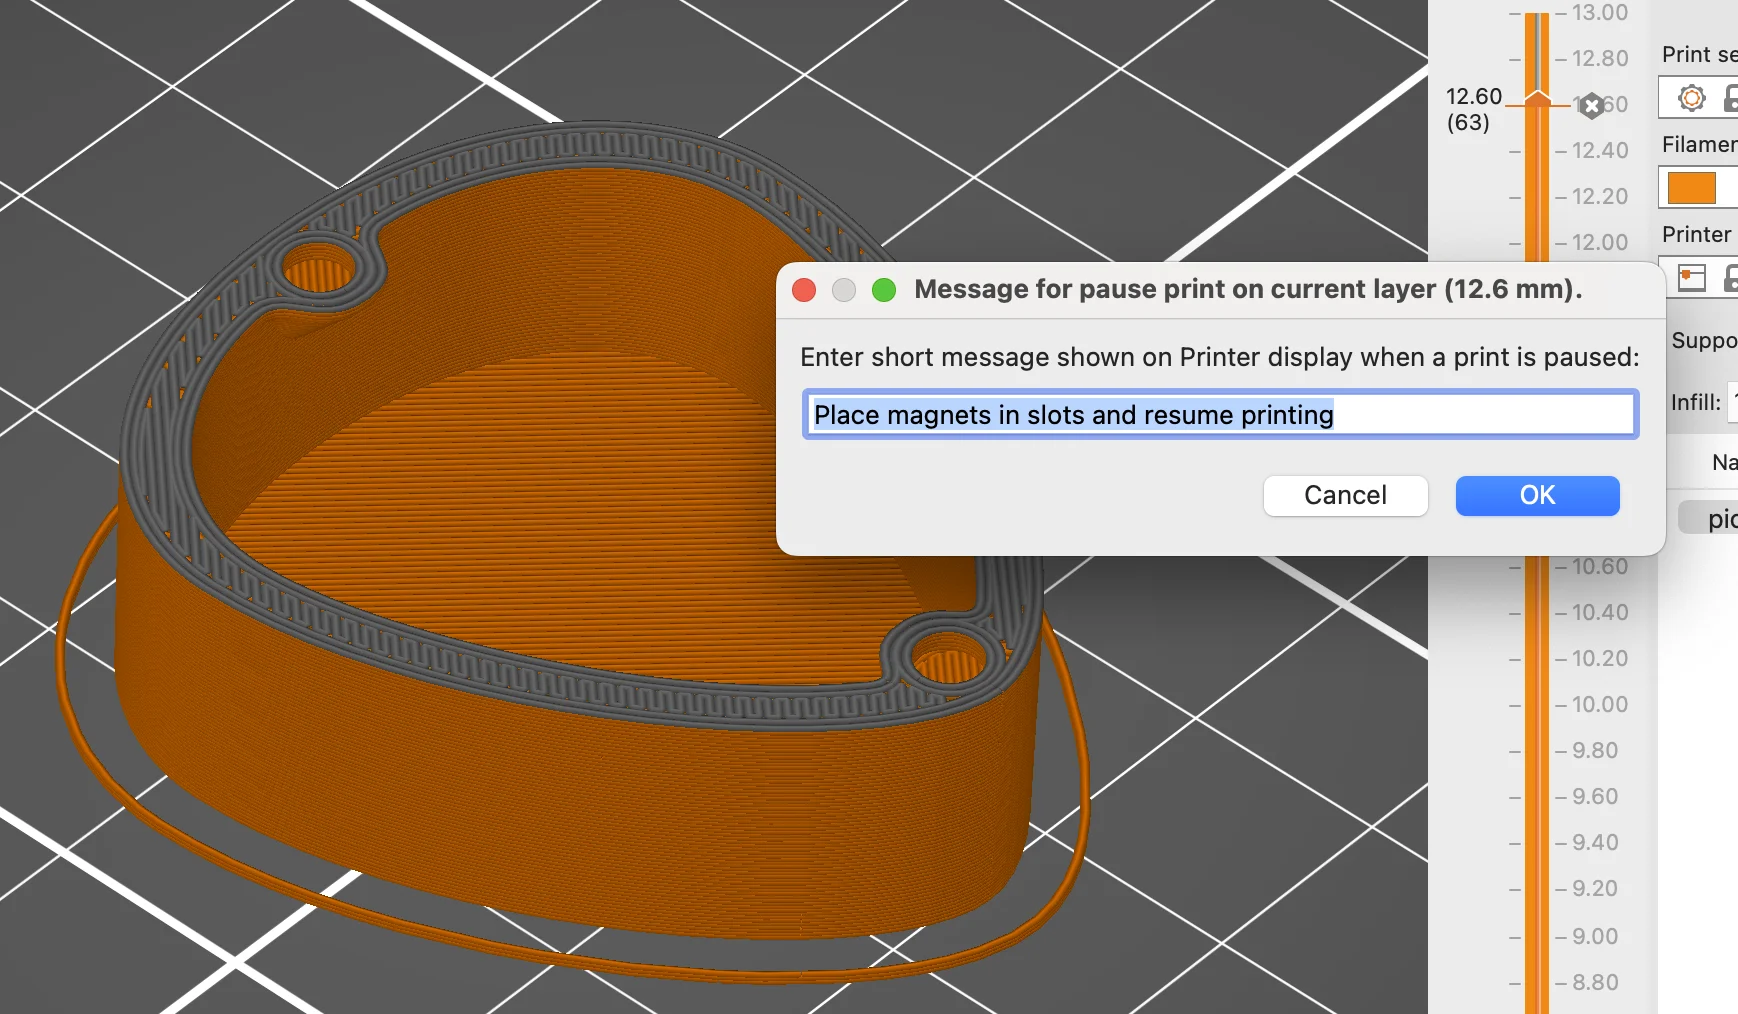
We then added a Pause Print at that point, your slicer will likely have the same or similar. Perhaps you could use a face colour change.
The GCode is M601 and we can add a little message to show when it's paused.
We exported the GCode, uploaded it into Octoprint, and sent it to the printer. You can use your method of choice SD card, USB, etc.
Step 4 - 5 Place & Resume
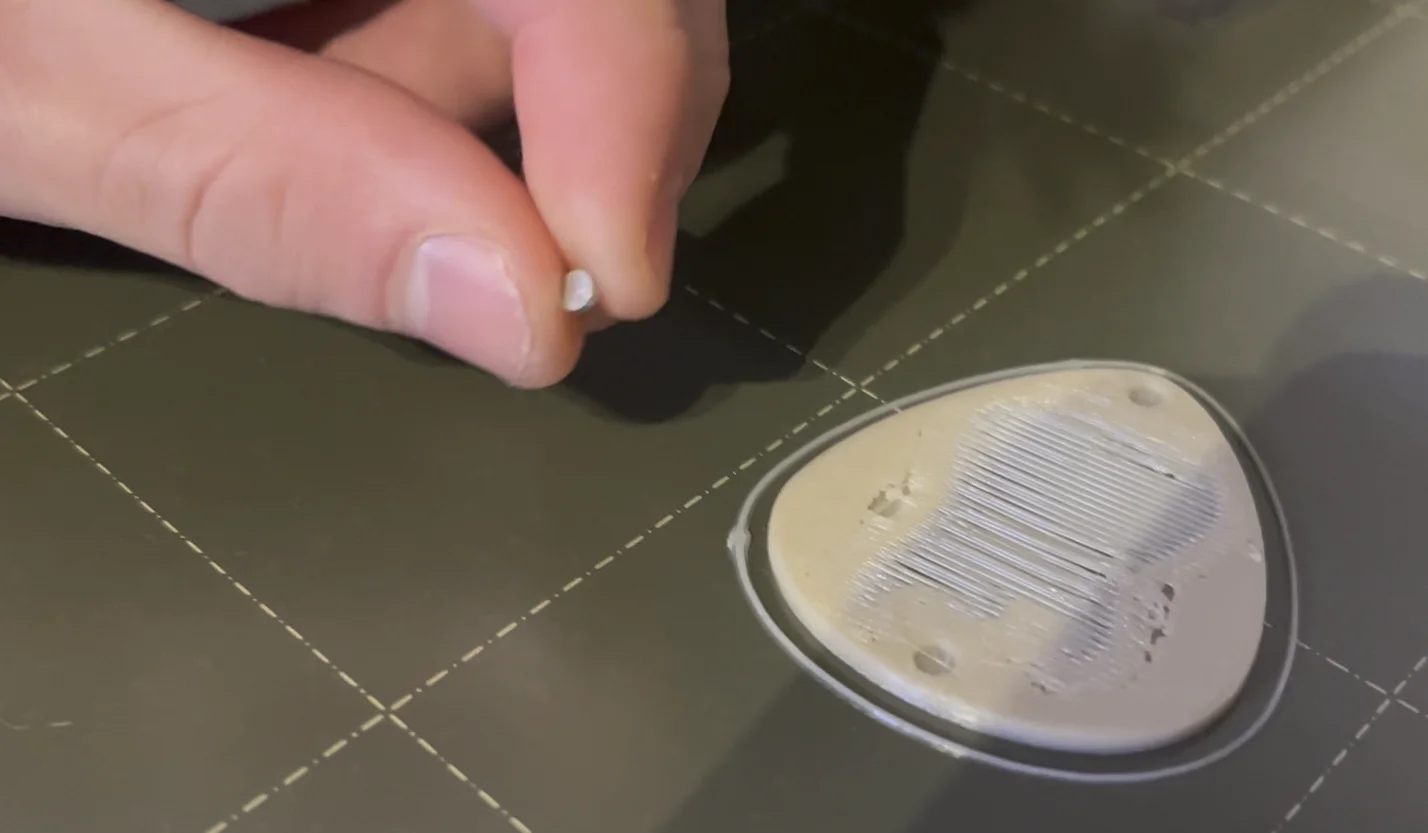
The 3D printer paused and the print head moved out of the way allowing us to place the magnets in place.
It's stringy because the layer has just bridged a large gap where we will place an inlay on the lid later.
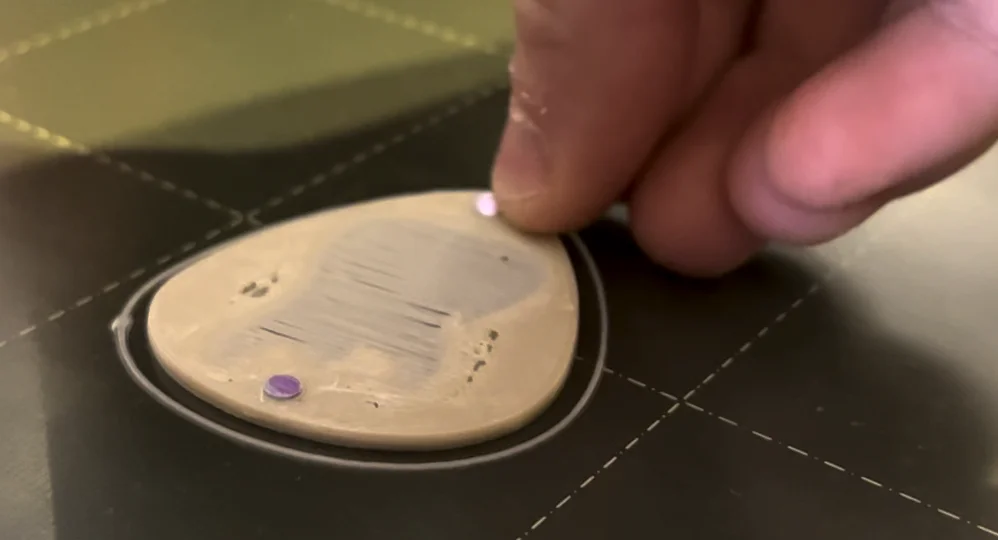
This was pretty easy with PLA but working with wood filament proved to be more challenging. The stringy nature of the material made it difficult to position the magnets accurately. Perhaps a 3.3mm diameter gap would have helped.
This image is of the wood filament print paused ready to place the magnets. Note the stringy filament, it was much easier with PLA.

We'd done a dozen printed with no problem until the wood. We managed with the lid but the box was fiddly and we didn't notice the magnet wasn't flush.
Unfortunately, despite our best efforts, one of the magnets on the box print was not seated properly, and ended up slightly proud of the surface.
This caused the print head to knock against the magnet during the printing process, resulting in a step in the final print.
Just one bad print from so many successful prints isn't too bad though and we did get some nice wooden boxes in the end.
Lesson learned, check the magnet is seated well before you resume the print.
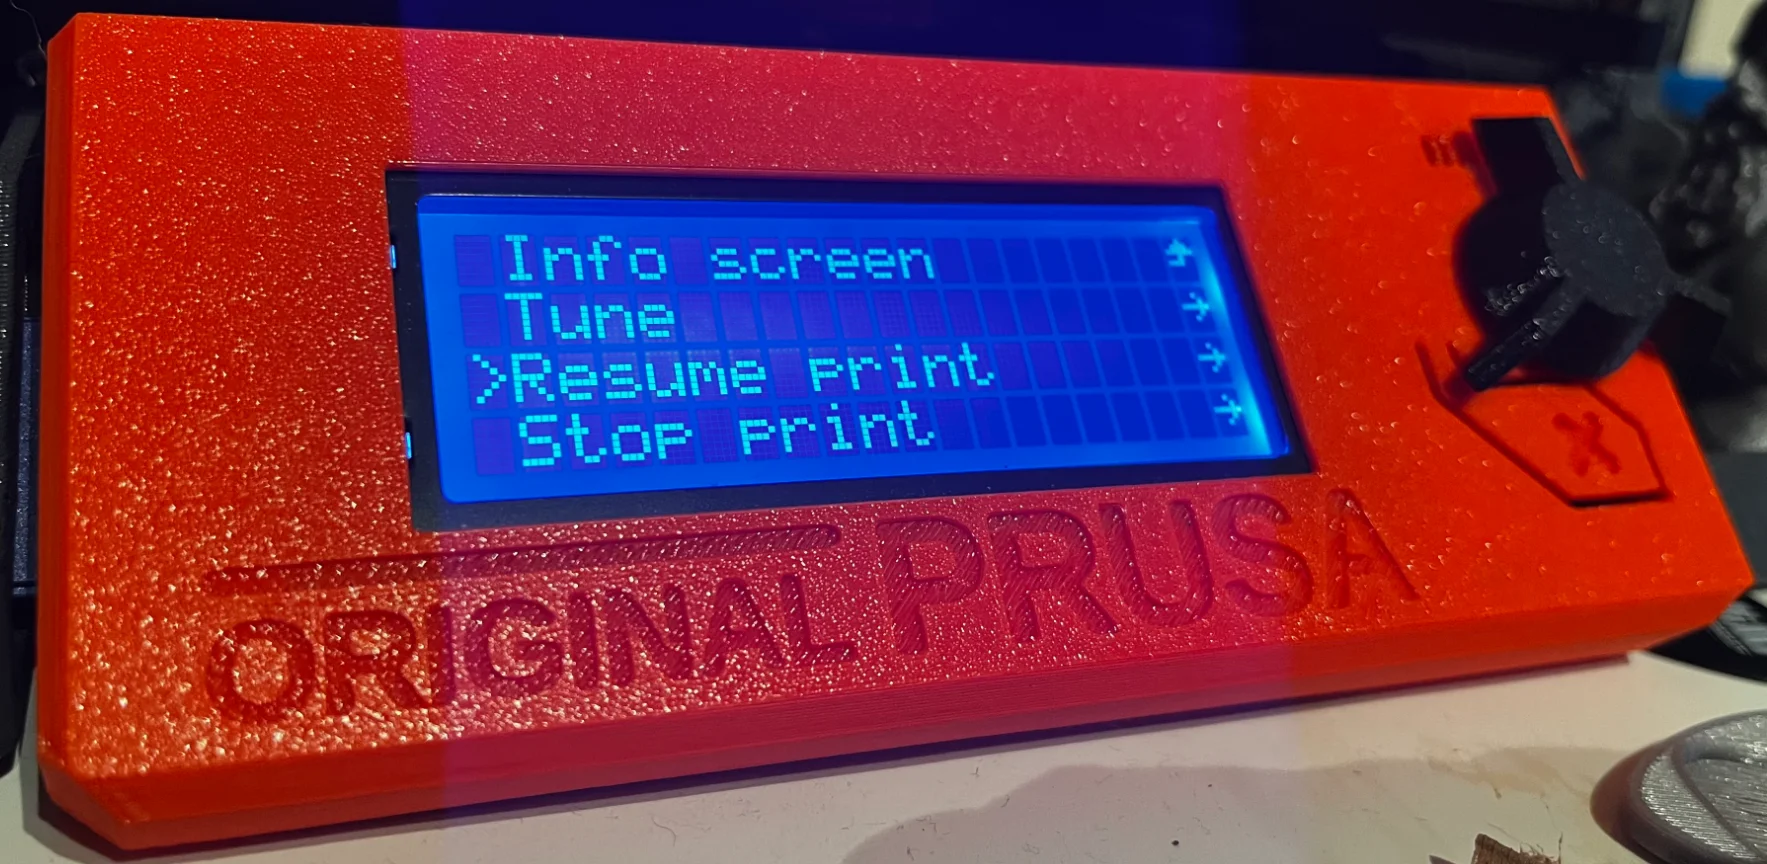
We were unsure how to resume the print, but we just pressed the Prusa button and scrolled down to resume print.
Polarity
Placing the magnets in the correct position and orientation is crucial.
To ensure that the north and south poles are properly aligned with the corresponding areas on the lid and box, we marked the magnets with a sharpie. However, we found that the ink came off easily
One way to determine the correct orientation of the magnets is to use a finished lid or box as a reference. Simply drop a couple of magnets onto the finished part and see how they align. If you are using a lid and making a lid, or using a box and making a box, you can place the magnets in the same orientation as they stick to the finished part. If you are making the opposite part, you will need to flip the orientation of the magnets.
Results, Lessons Learned, & Final Thoughts
We learned a lot from our first venture into embedding components into 3D prints. Possibly overkill for the pick box, but it was a good project for our initial test.
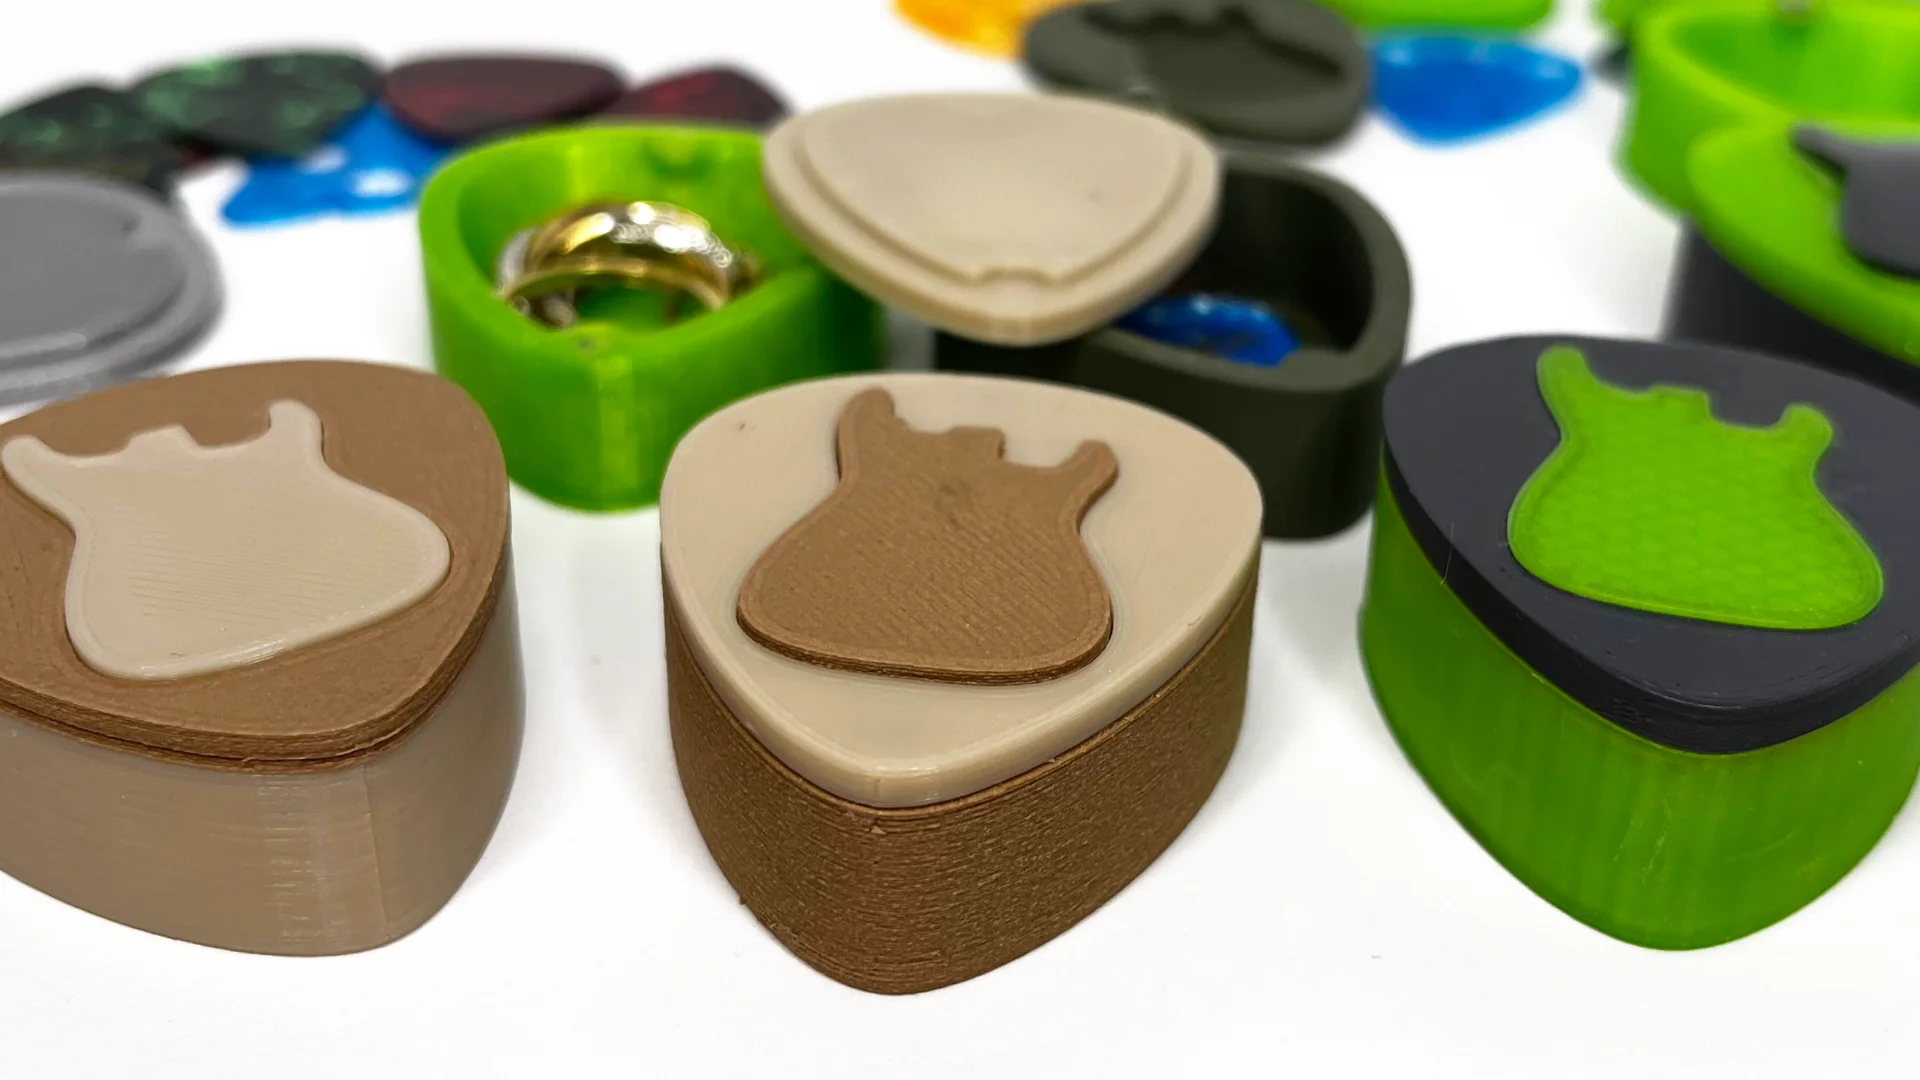
The green box to the right is about 4 years old, you may just make out the elephant's foot distortion from our previous printer.
In the center is the new wooden model printed moments before the shot was taken which was the most challenging filament to work with.
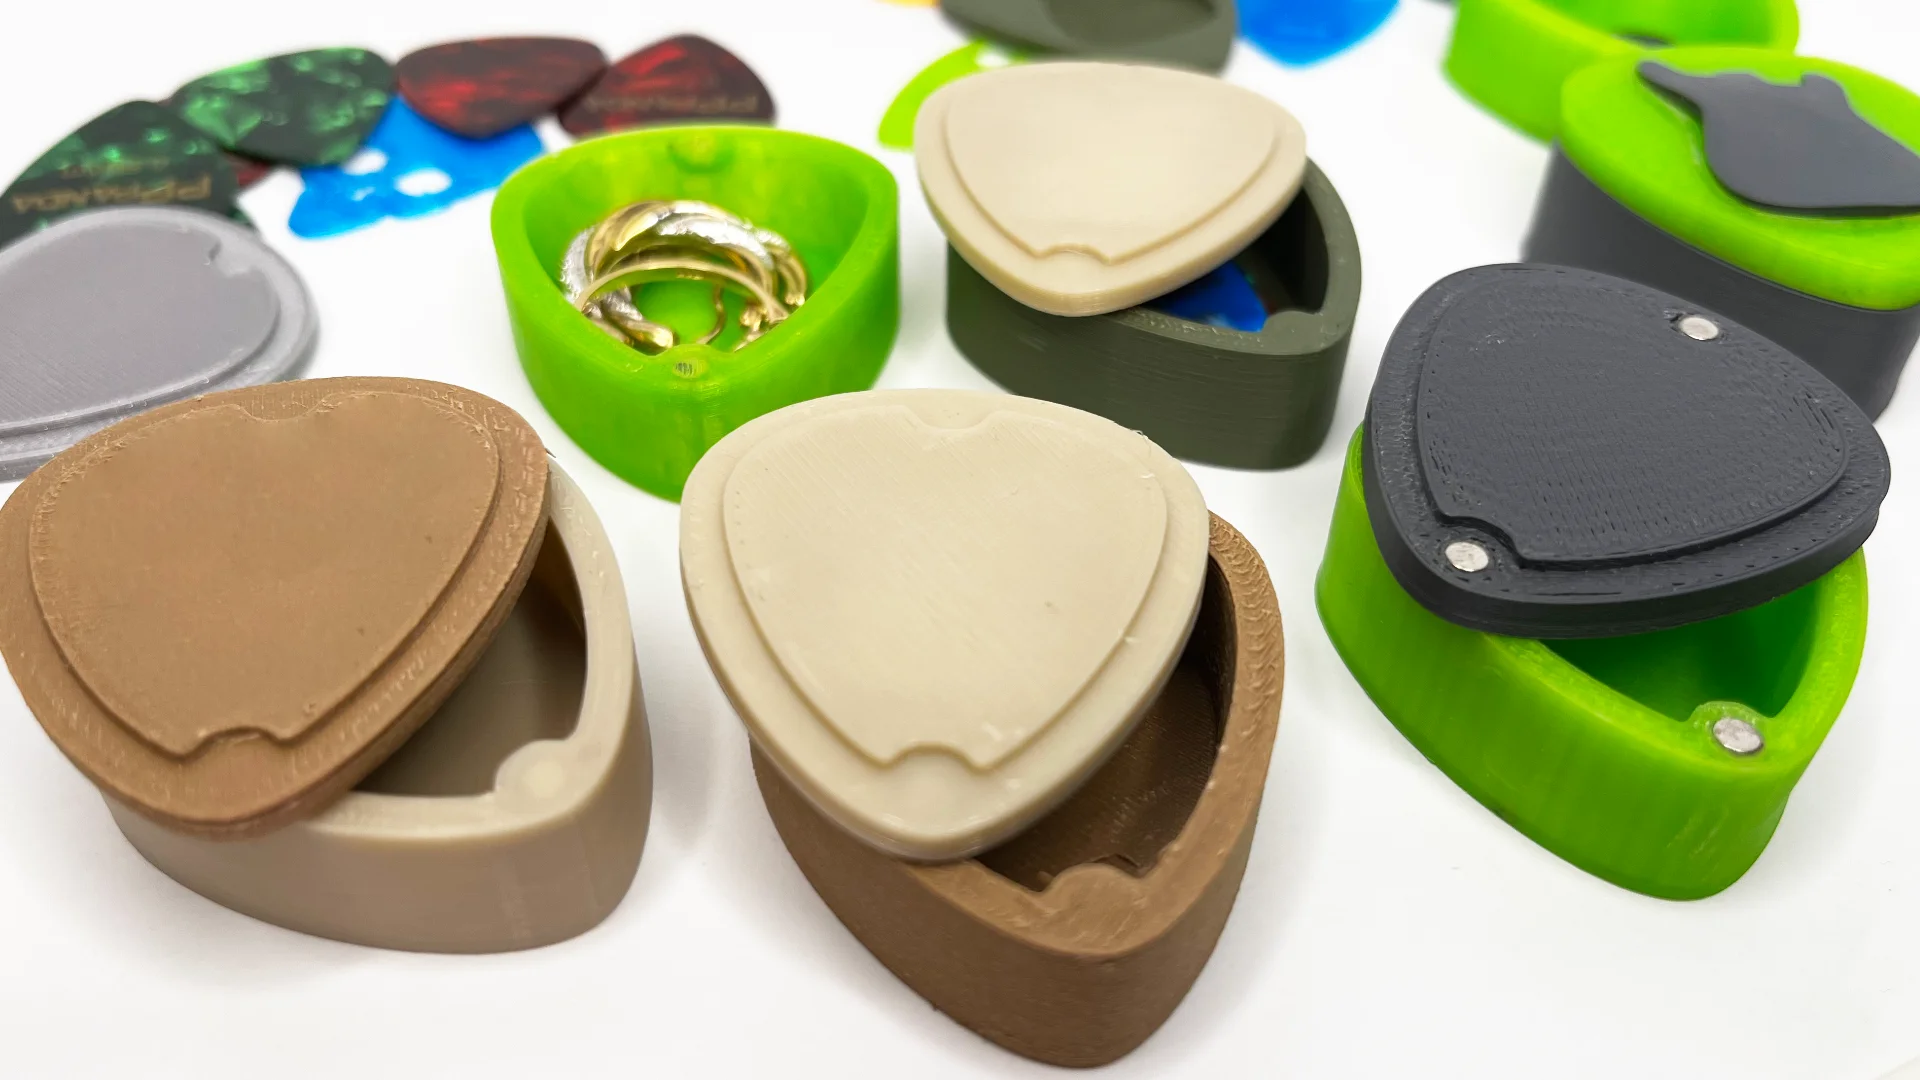
The magnets are strong enough with the embedded version but we like how hard the non-embedded is to open.
We may make the hole deeper and put 2 magnets inside for that AirPod Case feel.
Possibly 0.2mm tolerance isn't enough so we may increase that next time to make it easier to place the embedded components.
Overall we won't be afraid to pause prints in our manufacturing process. It's really not the complicated task we imagined.
Get All The Guitar Pick Box Model Files
You can get all the files over at printables.com using the link below. Let us know how you go and happy printing.
https://www.printables.com/model/336093-guitar-pick-box-trinket-box-and-picks