projects
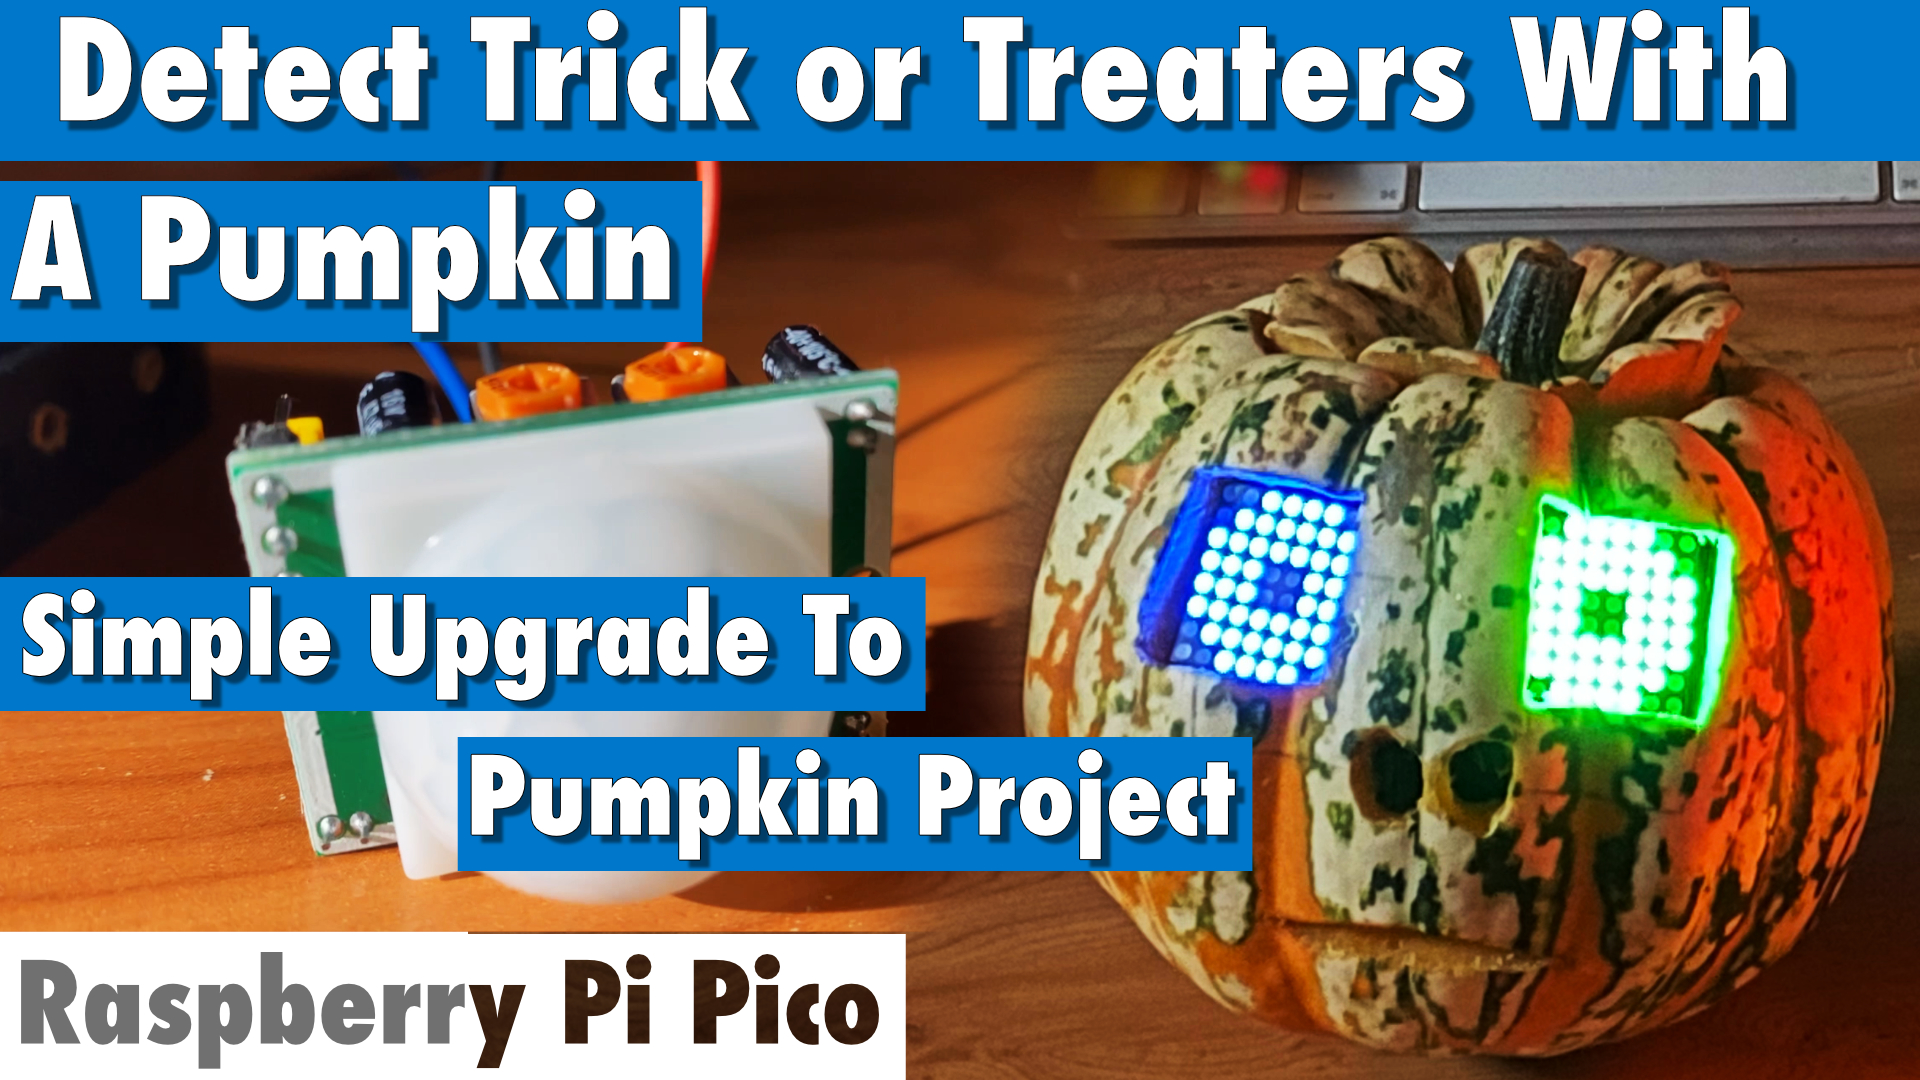
8x8 LED Matrix Halloween Jack-o'-lantern / Pumpkin with a Pico
Here we update our 2015 Raspberry Pi Halloween Jack-o'-lantern / Pumpkin project to work with an RP2040 Raspberry Pi Pico, although it should work with any MicroPython device.
- Overview
- Detailed Video Instructions And Demo
- Parts List
- Setup
- Customise Everything
- Add Motion Detection Update
- Download The Code
Overview
Clive (an old friend our Halloween Pumpkin) has given years of service and fun. Tethered to the wall or charger it's time to set this project free and give it an update.
It was always a chore to set up every year and set a startup script to run the Python code on booting up. With a microcontroller we should see those eyes lighting up almost instantaneously. We'll let you know what you need, how to put it together, give you the code, and show you how to customise everything to your heart's content.
Detailed Video Instructions And Demo
Parts List
- Microcontroller compatible with MicroPython (we used an RP2040 Pico)
- Two 8x8 LED Matrix with a backpack search for MAX7219 or HT16K33 driver chip
- Jumper Wire
- Pumpkin
Setup
HT16K33 Driver
If you are using the HT16K33 version you just need to connect up the following
- 3v3 from the microcontroller VCC on your matrix
- GND to GND
- GPIO 5 to SCL
- GPIO 4 to SDA
You can change the pins but will need to change those in the code too which is trivial.
#i2c config
clock_pin = 5
data_pin = 4
bus = 0
You also need to let the code in main.py know what driver you are using
use_max7219 = False
use_i2c = True
If you don't know the address of each then it should print that in the console when you run the code, then you need to set those addresses in main.py. Below is our setup but replace with your own. Any problems try some values it's usually around 0x70, 0x71, 0x72...
i2c_addr_left = 0x70
i2c_addr_right = 0x72
You will also need to change the address of one of your devices by shorting the contacts on the back.
MAX7219 Driver
For the MAX7219 version you connect up the following
- 3v3 from the microcontroller VCC on your matrix
- GND to GND
- GPIO 7 to DIN
- GPIO 5 to CS
- GPIO 6 to CLK
Additionally you will need to connect your 2nd matrix to the 1st just match up the in and out it's very simple.
- VCC to VCC
- GND to GND
- DOUT to DIN
- CS to CS
- CLK to CLK
We use those pins and SPI 0 but you can change this but will need to change it in the code when you pass the SPI(0) to the max7219_matrix class.
You also need to let the code in main.py know what driver you are using
use_max7219 = True
use_i2c = False
Customise Everything
Everything can be customised and we didn't spent a lot of time creating the sprites and animations so would love to see what you do with it creatively.
Drop us a pull request to add your sprites and animations, and we can share them with everyone.
Create Your Own Sprites
You can use our handy online matrix tool to design new 8x8 sprite designs and it will give you a list of HEX numbers for your code.
If you take a look at the matrix_fonts.py file the fonts are stored in variables. Check our the variable called eyes which is a python dictionary, below is a little sample.
eyes={
    'straight':[0x3c,0x7e,0xff,0xe7,0xe7,0xff,0x7e,0x3c],
    'straightX2':[0x3c,0x7e,0xe7,0xc3,0xc3,0xe7,0x7e,0x3c],
    'straightX3':[0x3c,0x66,0xc3,0x81,0x81,0xc3,0x66,0x3c]
}
Each sprite has a key followed by an array of 8 hex numbers. Just add a new one, write your own key and add the numbers from the online tool. Below we added a new sprite called 'new' which is just a diagonal line.
eyes={
    'new':[0x01,0x02,0x04,0x08,0x10,0x20,0x40,0x80],
    'straight':[0x3c,0x7e,0xff,0xe7,0xe7,0xff,0x7e,0x3c],
    'straightX2':[0x3c,0x7e,0xe7,0xc3,0xc3,0xe7,0x7e,0x3c],
    'straightX3':[0x3c,0x66,0xc3,0x81,0x81,0xc3,0x66,0x3c]
}
Create Your Own Animations
Animations are stored in a JSON file called eyes_ani.json and you can change these too. We have picked out 'stareAndBlink' you can copy this, rename it and use it as a template for your new custom animation.
{
"stareAndBlink": [
    {"r":"straight","l":"straight","d":1},
    {"r":"straightBlink1","l":"straightBlink1","d":0.02},
    {"r":"straightBlink2","l":"straightBlink2","d":0.02},
    {"r":"straightBlink3","l":"straightBlink3","d":0.02},
    {"r":"all_off","l":"all_off","d":0.02},
    {"r":"straightBlink2","l":"straightBlink2","d":0.02},
    {"r":"straightBlink1","l":"straightBlink1","d":0.02},
    {"r":"straight","l":"straight","d":0.02},
    {"d":0.5,"bl":1,"br":1},
    {"d":0.5,"bl":15,"br":15}
]
}
Each line is instructions to the eyes for that frame of animation,
- "r":"straight" means right eye should show the sprite called "straight".
- "l":"straightBlink2" means left eye should show the sprite called "straightBlink2".
- "d" is the delay so "d":1 means delay for 1 second.
- "bl" and "br" sets the brightness of the left and right eye.
Obviously you can use the custom sprites you created yourself.
Add Motion Detection Update
In this article we added a motion sensor to the project.
Download The Code
All the code is on our pico-pumpkin github repo