projects
DIY Pico Pong: Build Your Own Mini Arcade Game with a Raspberry Pi Pico
In this tutorial, we'll show you how to build your own classic PONG mini arcade game using a Raspberry Pi Pico. We'll provide all of the code you need to get started and share our own journey of creating our version of Pico Pong. The best part? This project is very cheap and easy to make, so anyone can give it a try.
With a little bit of creativity, you'll be able to customize your own version of Pico Pong and bring it to life on an OLED display. So grab your Raspberry Pi Pico and let's get started!
Video
Parts
Parts List
To make Pico Pong with a Raspberry Pi Pico, you will need the following materials:
- All the code is free at GitHub.com
- Raspberry Pi Pico (or other microcontroller)
- Breadboard or 2 if you are prototyping (optional)
- Jumper wires
- 2 potentiometers (to control the paddles)
- OLED display SSD1306
- A small speaker or piezo buzzer (optional for sound effects)
- A momentary switch to restart the game (optional)
- Caps for your potentiometers (optional)
Potentiometers for Cheap Analog Controllers
A cheap potentiometer is perfect to control the paddle just like the original. We picked up 20 for around £9. You will need 2. We used a 10k ohm but others will work, go for linear rather than logarithmic. We tested with a 1k ohm and it worked just as well.
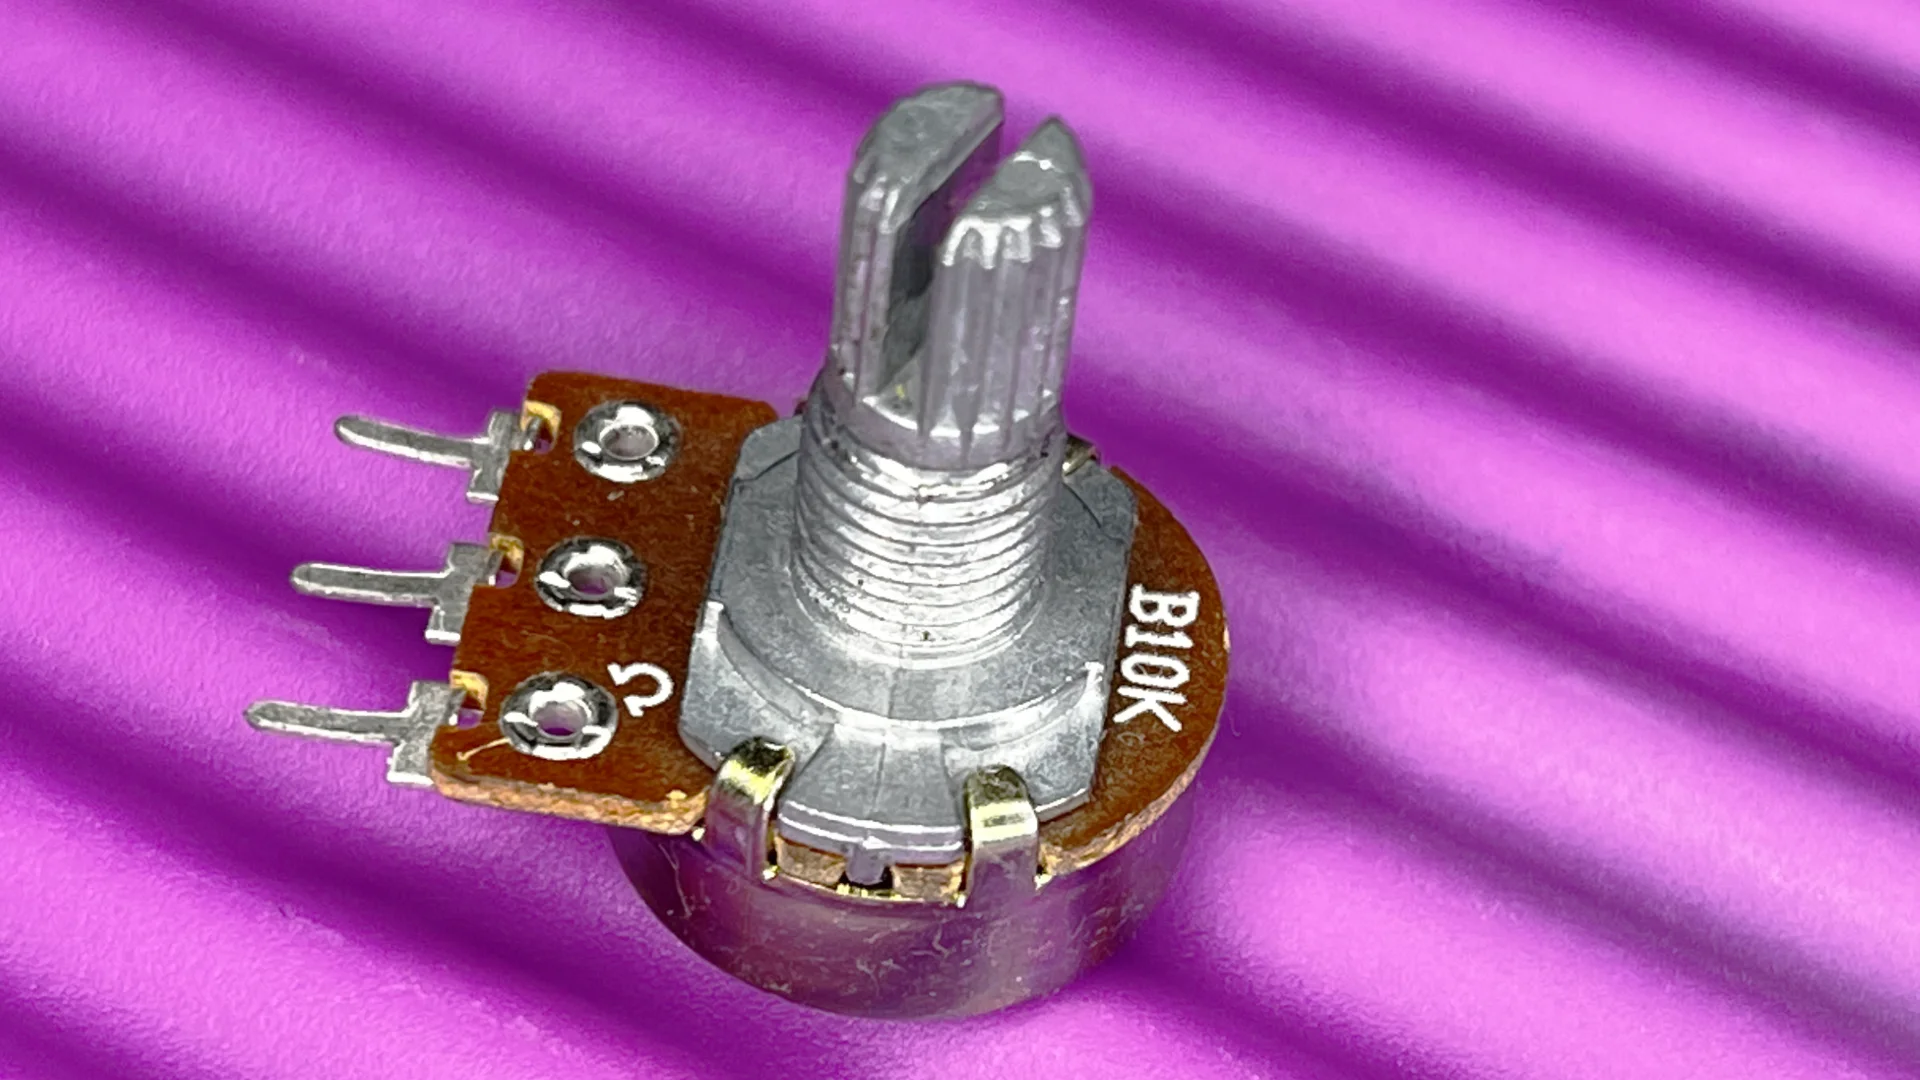
This project was a happy accident as we were doing a video about a rotary encoder and thought pong would be a great way to demonstrate it.
The game was unplayable and we were really disappointed. We tested a potentiometer instead and it was so amazing we couldn't wait to create the game and turn it into a real project.
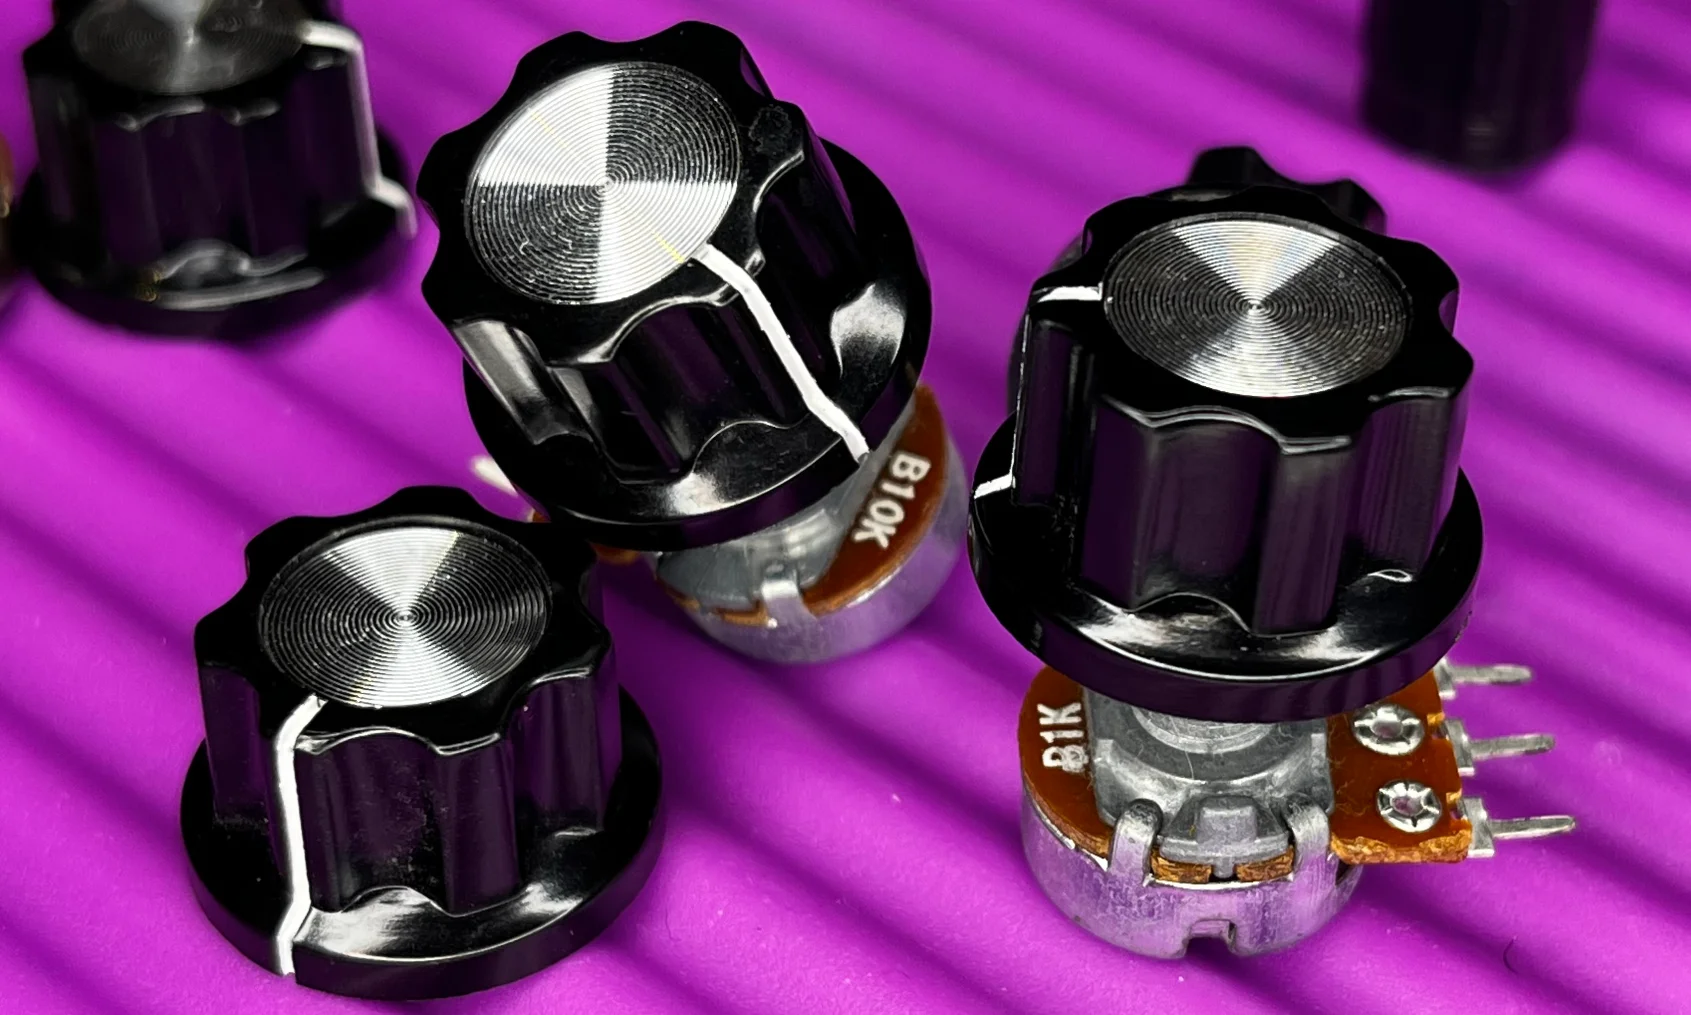
We picked up some really nice caps for the pots but we'll leave it to you to decide your own setup.
Microcontroller
For this project, we used the RP2040 microcontroller, which is affordable and widely available. However, you can use almost any microcontroller for this project and may need to adjust the code slightly depending on your selection.
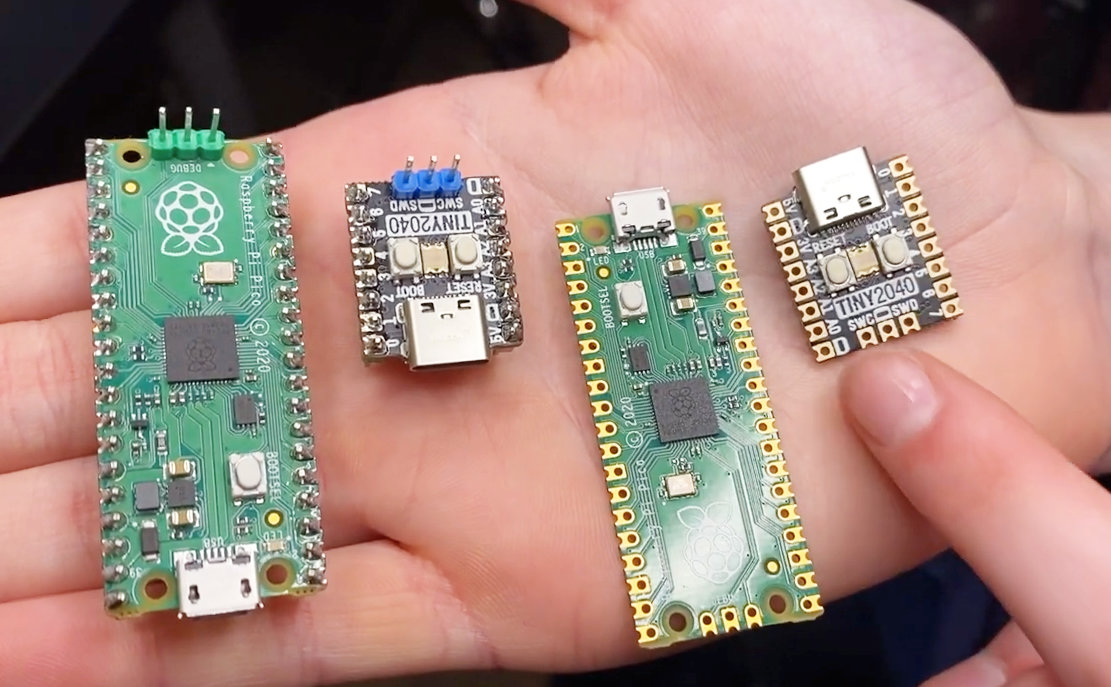
We paid £3 for ours and our first one was free on the cover of a magazine.
To control the paddles in your Pico Pong game, you will need at least two analog input pins on your microcontroller.
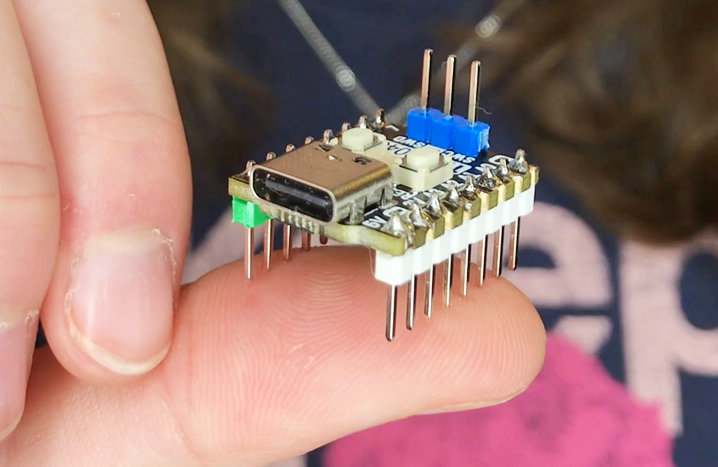
We buy them without header pins and solder our own on as it's cheaper and we like bright colours. If you don't want the hassle then get your board with the header pins pre-soldered.
We also built a version using the Pimoroni Tiny 2040.
OLED Screen
To bring our Pico Pong game to life, we used an OLED screen to display the game graphics and score. We selected an i2c SSD1306 display, which we purchased for around £3. While you don't have to use the same display as us, you will need to adjust the code to work with your chosen display and screen size.
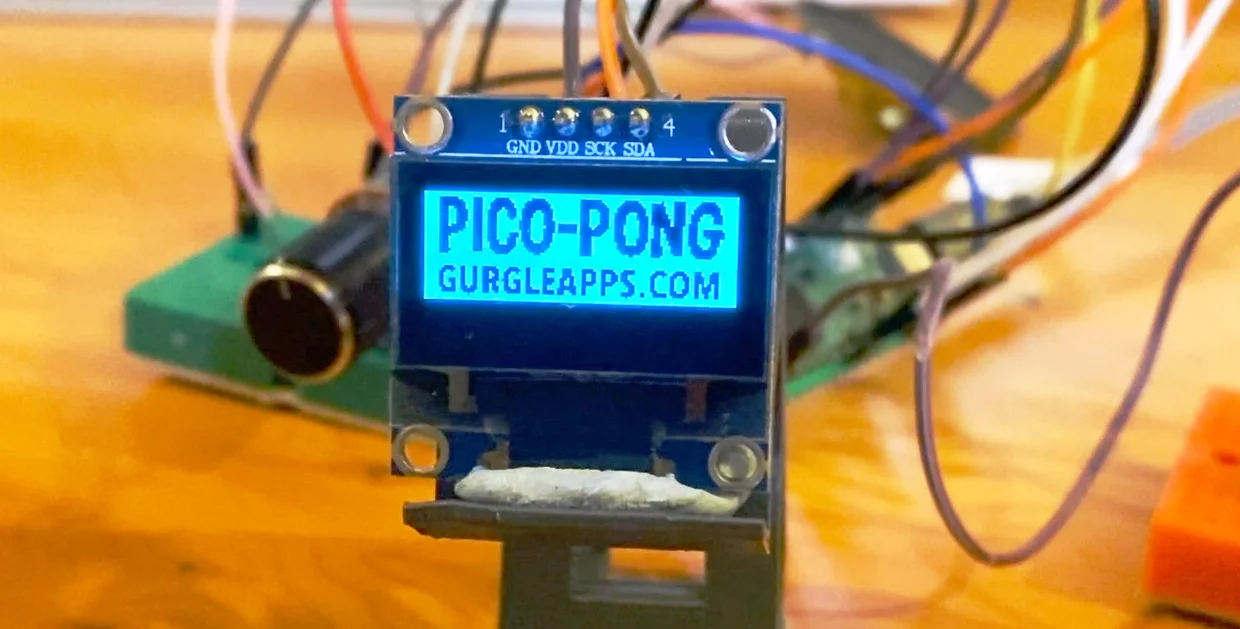
One of the OLED displays that we used had yellow pixels on the top few lines and blue on the rest which made the score and logo look amazing.
Speaker
This is optional but to add some extra excitement and immersion to our Pico Pong game, we decided to include sound effects.
We used a small speaker, which we purchased for around £1. However, you could also consider salvaging a speaker from a broken toy or device, or experimenting with different types of speakers or audio components.
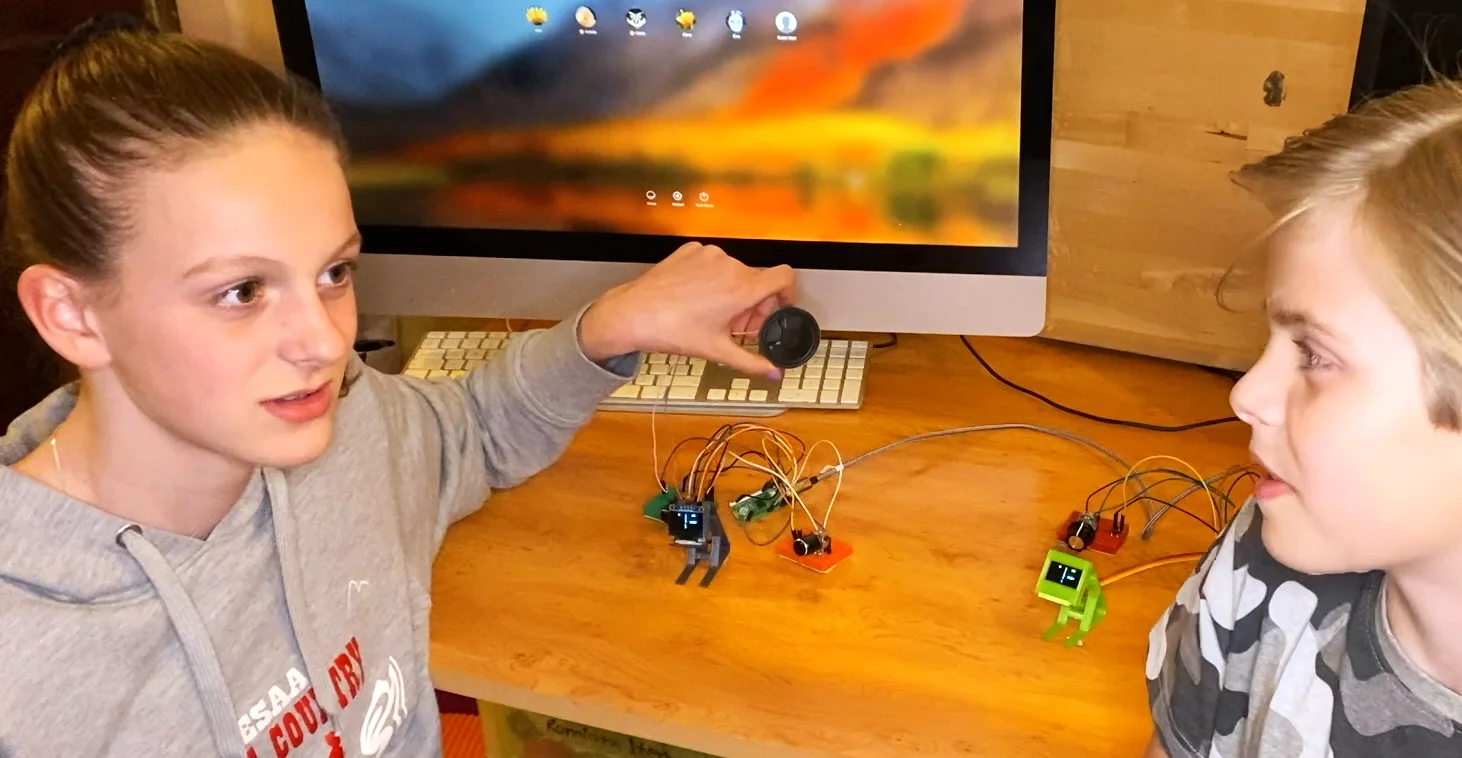
A small speaker is best, we did test a piezo buzzer and this also worked so again if you want to go off-piste and experiment for yourself.
We put a resistor in line with the speaker to protect the microcontroller but we won't judge if you skip that step.
The game will still work without sound though.
Breadboard
In the prototype stage, we used breadboards to quickly and easily connect and test our components. However, if you are building an enclosure or a more permanent setup, you may want to consider soldering the components instead.
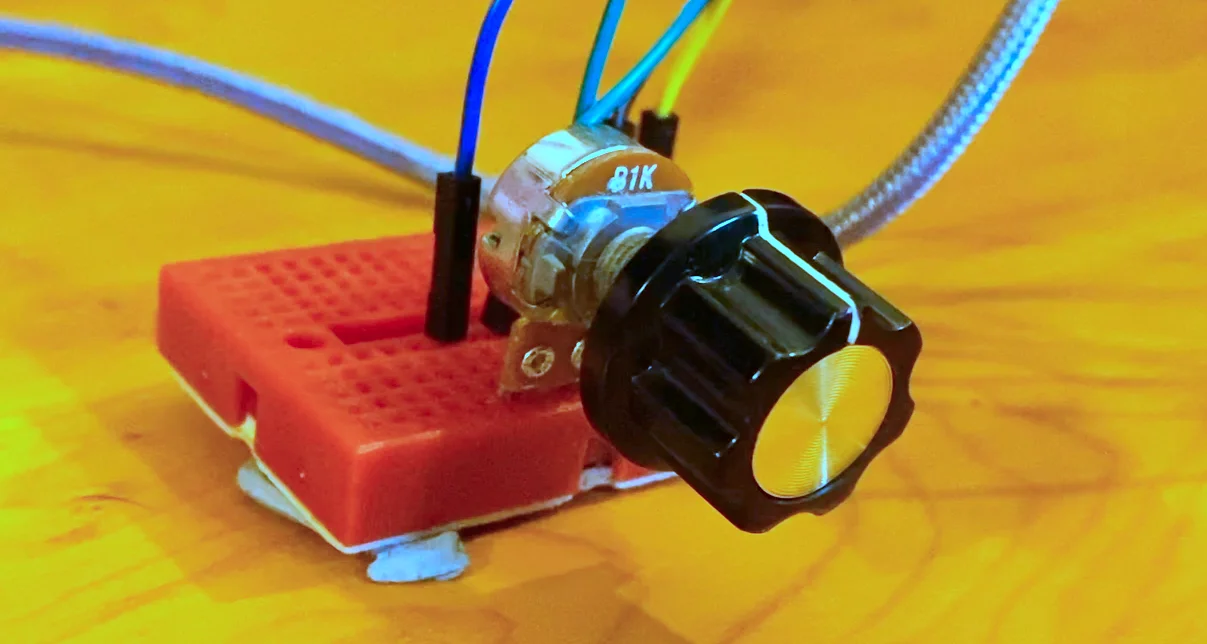
We used 2 mini breadboards so we could have the control knobs far enough away from each other to play comfortably.
You'll need some jumper wire too. We had all the components hanging around but the breadboard and jumper wire can be found for a few pounds.
Connecting Up
Potentiometers
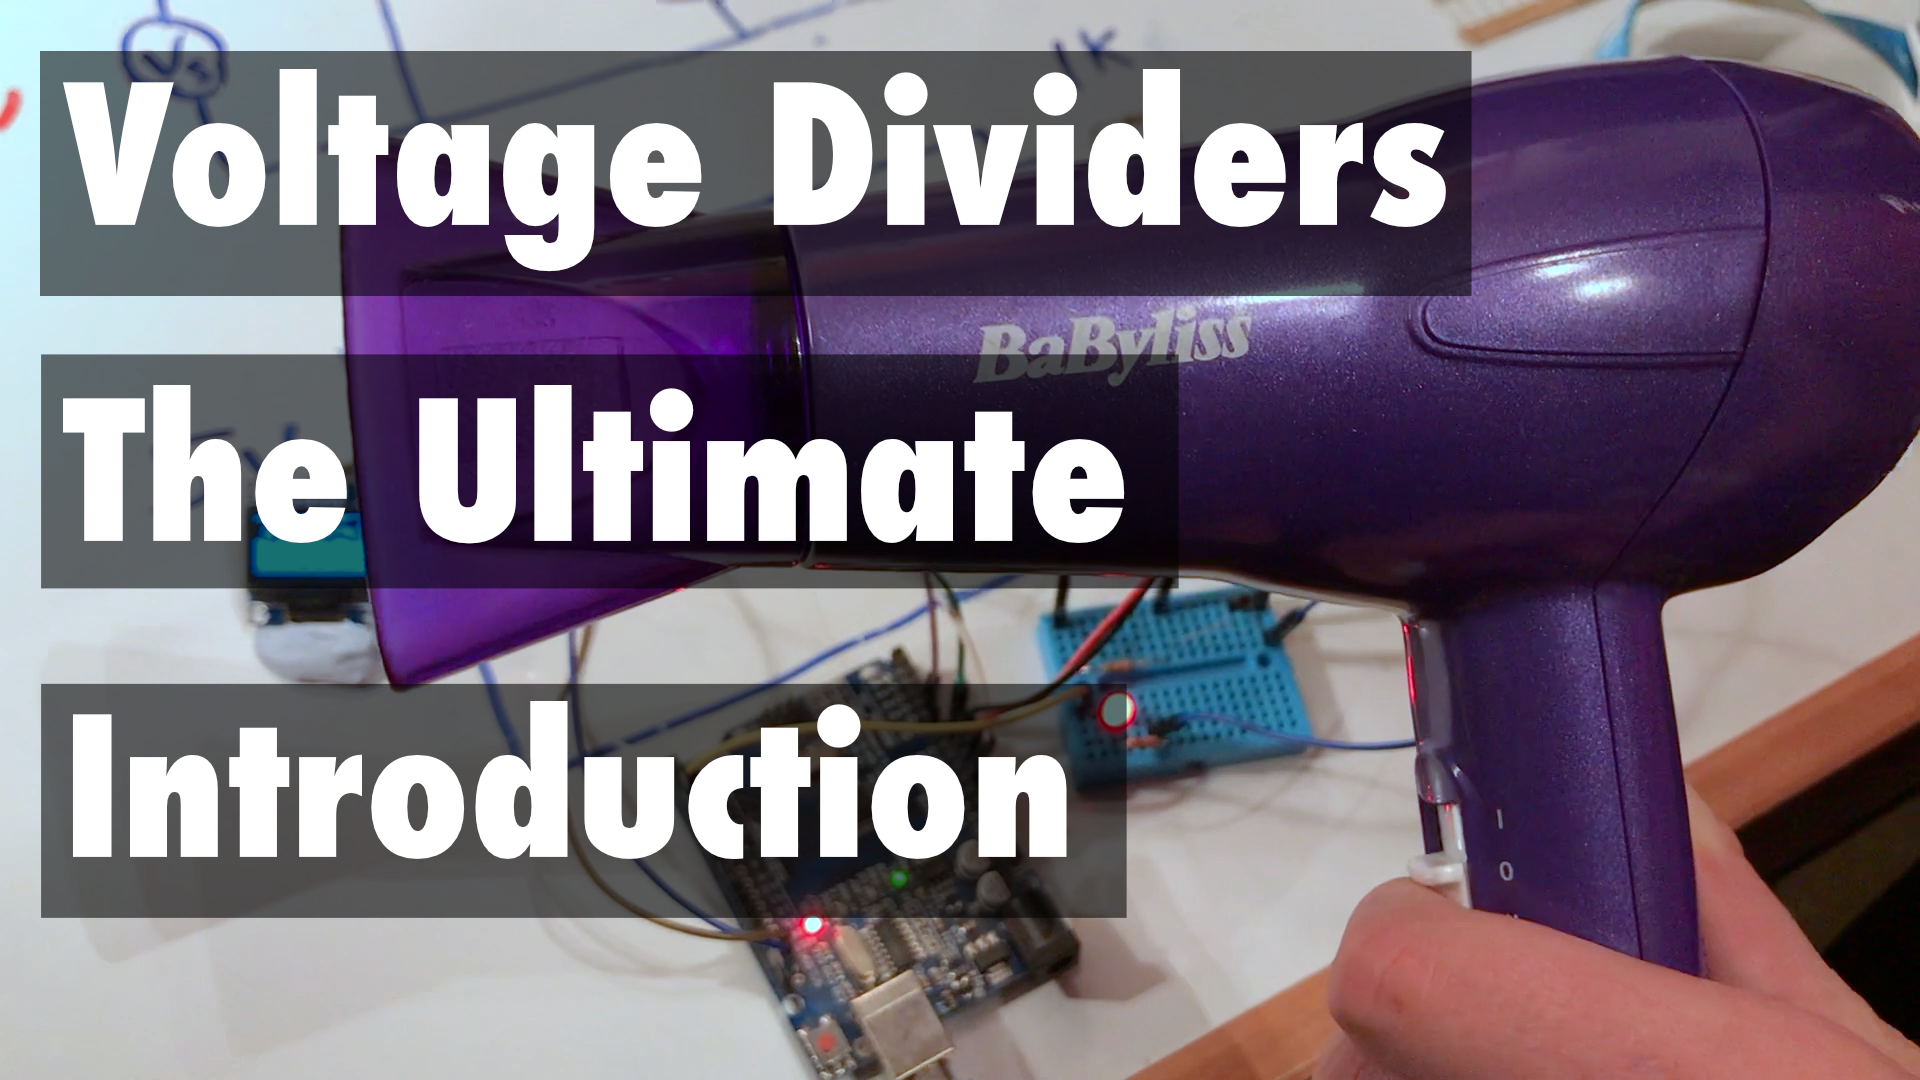
One of our most popular articles is this one explaining exactly how this potential/voltage divider works. It also shows loads more examples and explains about linear and logarithmic pots.
A potentiometer, or "pot" for short, is a type of variable resistor. You can use a potentiometer to control the movement of a paddle by attaching one end of the potentiometer to the positive voltage source, the other end to ground, and the middle pin to an analog input pin on the RP2040.
As you turn the potentiometer, the resistance between the middle pin and either of the other two pins will change, resulting in a change in the voltage at the middle pin. This change in voltage can be read by the RP2040 through the analog input pin, allowing you to control the paddle's position based on the potentiometer's position.
If your paddle is moving in the wrong direction, it is likely because the positive and negative connections are reversed. In this case, simply switch the connections around so that the positive connection is on the opposite end of the potentiometer.
Do this for both your "pots" and remember the analog input pin numbers to use in your code later.
Screen
To connect the screen to the microcontroller, we used an SSD1306 display, which communicates using I2C protocol. We connected the positive and ground terminals of the screen to the corresponding positive and ground pins on the microcontroller. Then, we connected the data and clock pins on the screen to the I2C clock and data pins on the microcontroller.
It is important to note the specific pins used for the data and clock connections, as you will need to update the code to reflect any changes in the pin assignments. In our case, we used pin 4 for data and pin 5 for clock.
You can also use a screen with a different communication protocol, such as SPI. If you choose to do so, you will need to modify the code to support the different protocol. To keep things simple, we used readily available and inexpensive components that are easy to locate.
Reset Button
Game Over - We piggyback on the reset button hack for a simple play again button.
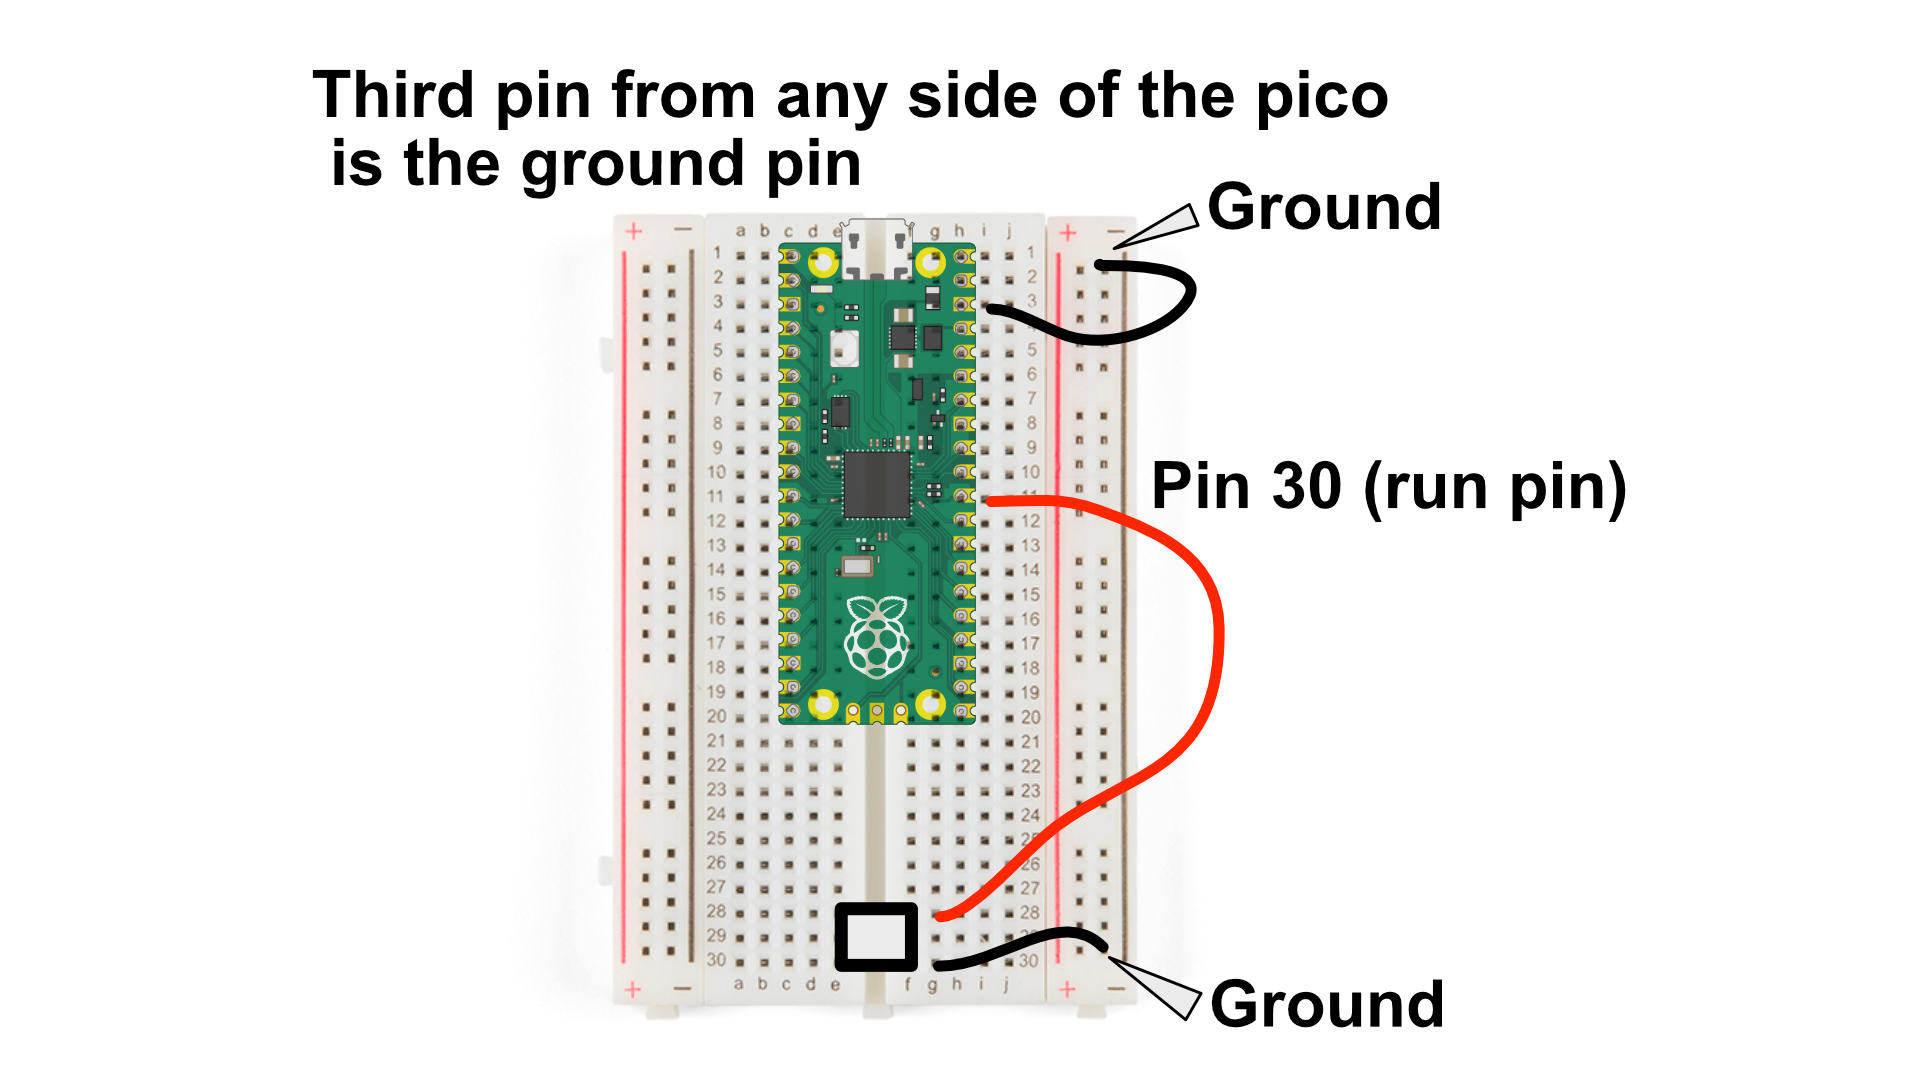
One side of a momentary switch to ground, the other to pin 30. For other microcontrollers, you'll need to look up how to do it, or you can tweak the code and use an input pin to play again.
Code
Get The Code
All the code is free at GitHub.com or you can scroll down and copy it from here. First we'll show you how to tweak the code for your setup.
Tweaks For Your Setup
To ensure that the code works with your specific setup, you may need to make some adjustments to the pin assignments.
Change the pin numbers in the code to match the ones you have used for the speaker, play button, left and right potentiometers. Also, make sure to update the clock pin and I2C bus number for your I2C display to match your setup.
These are the lines you need to change:
speaker_pin = 3
play_button_pin = 2
left = 26
right = 27
clockPin = 5
dataPin = 4
bus = 0
Change The Theme Tune
To customize the theme tune for your Pong game, you can modify the notes list in the following function:
def play_theme():
    notes = [[587,0.5],[523,0.5],[587,0.5],[0,0.5],[587,0.5],[523,0.5],[587,0.5],[0,0.5]
             ,[587,0.5],[523,0.5],[440,0.5],[523,0.5],[659,0.5],[523,0.5],[587,0.75]]
    for note in notes:
        speaker.duty_u16(int(65535/2))
        if note[0] == 0:
            speaker.duty_u16(0)
        else:
            speaker.freq(note[0])
        time.sleep(note[1])
    speaker.duty_u16(0)
Each note in the list is represented by a pair of values in square brackets, separated by a comma. The first value is the frequency of the note, and the second value is the duration of the note. You can add or remove notes as desired by modifying the list.
You can also experiment with different frequencies and durations to create your own unique theme tune. If you want to recreate a specific tune, you can look up the frequencies of individual notes and round to the nearest whole number.
To help you with this process, here are some functions that can be used to convert between written notes, MIDI notes, and frequencies:
def note_to_midi(note):
    name = note.rstrip("0123456789-")
    octave = int(note[len(name):])
    note_to_num = {
        "C": 0,
        "C#": 1,
        "D": 2,
        "D#": 3,
        "E": 4,
        "F": 5,
        "F#": 6,
        "G": 7,
        "G#": 8,
        "A": 9,
        "A#": 10,
        "B": 11
    }
    midi = octave*12+note_to_num[name]+12
    return midi
################################################################################

def midi_to_freq(midi_num, should_round = False):
    distance = midi_num-69
    freq = 440*2**(distance/12)
    if should_round:
        return round(freq)
    return freq
################################################################################

def note_to_freq(note, should_round = False):
    midi = note_to_midi(note)
    return midi_to_freq(midi, should_round)
For example, to get the frequency of a C in octave 4, you can use the following code:
note_to_freq("C4")
Full Code
import ssd1306
import machine
import utime as  time
import framebuf
import base64
import math
print("GurgleApps.com Pico Pong")
# would have used pin 1 & 2 but they were broken on one of our Pico Boards
speaker_pin = 3
play_button_pin = 2
left = 26
right = 27
clockPin = 5
dataPin = 4
bus = 0
mode_init = 1
mode_playing = 2
mode_game_over = 3
mode = mode_init # mode_init,mode_playing,mode_game_over
analog_pin_left = machine.ADC(left)
analog_pin_right = machine.ADC(right)
play_button = machine.Pin(play_button_pin,machine.Pin.IN, machine.Pin.PULL_DOWN)
speaker = machine.PWM(machine.Pin(speaker_pin))
speaker.duty_u16(0)
i2c = machine.I2C(bus,sda=machine.Pin(dataPin),scl=machine.Pin(clockPin))
display = ssd1306.SSD1306_I2C(128,64,i2c)
logoSmallB = b'aBn/gP//wH//4D//8B/w/AAf/gAP/wAH/4AD8MAAAeAAAPAAAHgAADAAAAAAAAAAAAAAAAAAAAAAAAAAAAAAAAAAAAAAAAAAAgAAAAAAAAAAAAAAAA4AAAAAAAOAAAAAACAOAAAAAAADgAAAAAAgCxAAAAAAHQAB4AMeIAscAAGMAB2AAeBPHiAJHsACmqAbwAGySBIhixLxwhr8H4ABEkgSIt8S+UIS3h+AARJIEiLfktsGE5IVIAFCSBoj2ZrbgoqSGYABckgeIhGe2MOOkgngATPIAiKQFthYBpIZgAEzwBIjgBD70ACSCYAB4AAaAQAQ0YAAEgmAAOAADgAAEMAAAAJpgAAAAAQAAADAAAAACADAAAHgAADwQAB4AAAw+AAP/AAH/gAD/wAB8P+A///Af//gP//wH/D////////////////w'
logoLargeB = b'gB//8A////AP///wD///8A///4AB//+AAf//gAH//4AB//wAAD/8AAA//AAAP/wAAD/gAAAH4AAAB+AAAAfgAAAHAAAAAAAAAAAAAAAAAAAAAAAAAAAAAAAAAAAAAAAAAAAAAAAAAAAAAAAAAAAAAAAAAAAAAAAAAHAAAAAAAAAAMAAAAAAAAAB4AAAAAAAAAHgAAAAAABgAeAAAAAAAAADwAAAAAAAYAFhgAAAAAAAHcAA4AAwZGADYYAAAHHAABwAAfAB8PxgA2HyAADz7AA94AH4CfjMYAMxswABs68AG8ABmMmQzGDiMZvBwYMvsA/QAZjJgMxh4/Gb4+GDP/g/wAMIyYDMYTPxmzNBgzz4B8ADCMmAzGN3sZszAZM8yDxQAwDJgExj5jmbM8GxPMgdwAM4yYB8YwYZ+zHh8fzMHdADPN2AfGMmAfswbMDszB3QARz9gAxjZgGzsmwADMwZ0AGY6ADMYeABg/PIAATMWdAB+AAATCGAAYNzgAAAzBnQAPgAAHwAAAGDAAAAAAxZ0ABwAAA8AAAAAwAAAAAA2cAAAAAAAAAAAAMAAAAAABgDgAAAH4AAAB+BAAAfgAAAH/AAAP/wAAD/8AAA//AAAP//AA///wAP//8AD///AA///+B////gf///4H///+B//'
logoPongB = b'gCz///////////////////////////////////////////wD8Pgf8D//AH/A/7wfgf/8APDwD8Af/wA/gHg8HwD//ABw4AeAD/8AHwA4HB4Af/wAcOAHgA//AA4AGBwcAH/8MHDggwAH/w4OABgcHAB//DgwwcMDB/8PDA4YDBg4P/w4MMPDB4f/DwweCAwYfD/8ODDDwweH/w8MHggEGHw//Dgww+cPh/8PDB8IBBj8P/w4MMP+D4P/DwwfCAQQ///8OHDD/g+CAQ4MPwwAMP///CBww/4PwgEEDD8MQDDAP/wAcMP+D4IBABw/DEAwwB/8APDD/w+CAQA8PwxgMMAf/APww+EPh/8AfB8MYDDgH/wf8MPhD4f/B/weCGAw+H/8P/DDww+H/wf8HghwMPh//D/wwcMHB/8H/h4YcDB4f/w/8OHDgA//B/4AGDg4MP/8P/DgA4AP/wf+ABg4OAD//D/w4AfAH/8H/wA4ODgA//wf8PAP4D//B/+AeDw8Af/8P//4H/j//wf/8/h//gP/////////////////////////////////////////////////////////////////////////////////////////////////////////////DnMD4c+Dh4ODwf4eHjx//gZzAcDPg4eBgYH8DA44f/xucxGNz5+HmZiP+NjGGH/8/nMZn8+fg5mYj/n5xhh//P5zEZ/PgxOZmIf5+eYYf/zGcwEYz4MzgYHD+fnmUn/8xnMDmM+HM4OD4fn55kJ//OZzE5zPnwGfn/H5+cZCf/xmIxGMx54Bn5/x+PjGRn/+BgMRgMCCMZ+fgZwIDmZ//gcHGcDAgjmfn4OcDB5mf///3//////////v/////////////////////////////////////////////////w=='
logoPongIB = b'gCwAAAAAAAAAAAAAAAAAAAAAAAAAAAAAAAAAAAAAAAAAAAP8DwfgD8AA/4A/AEPgfgAD/w8P8D/gAP/Af4fD4P8AA/+PH/h/8AD/4P/H4+H/gAP/jx/4f/AA//H/5+Pj/4ADz48ffP/4APHx/+fj4/+AA8fPPjz8+ADw8/Hn8+fHwAPHzzw8+HgA8PPh9/Png8ADx888PPh4APDz4ff754PAA8fPPBjweADw8+D3++cDwAPHzzwB8HwA8PPg9/vvAAADx488AfB9/vHzwPP/zwAAA9+PPAHwPf7788Dzv88/wAP/jzwB8H3+/+PA87/PP+AD/w88APB9/v/DwPOfzz/gA/wPPB7weAD/g+Dzn88f4APgDzwe8HgA+APh95/PB4ADwA88PPB4APgD4fePzweAA8APPjz4+AD4AeHnj8+HgAPADx48f/AA+AH/58fHzwADwA8f/H/wAPgB/+fHx/8AA8APH/g/4AD4AP/Hx8f/AAPgDw/wH8AA+AB/h8PD/gADwAAH4AcAAPgADAeAAfwAAAAAAAAAAAAAAAAAAAAAAAAAAAAAAAAAAAAAAAAAAAAAAAAAAAAAAAAAAAAAAAAAAAAAAAAAAAAAAAAAAAAAAAAAAAAAAAAAAAAAAAAAAAAA8Yz8HjB8eHx8PgHh4cOAAfmM/j8wfHh+fn4D8/HHgAORjO5yMGB4ZmdwByc554ADAYzmYDBgfGZncAYGOeeAAwGM7mAwfOxmZ3gGBhnngAM5jP7nMHzMfn48BgYZrYADOYz8ZzB4zHx8HgYGGb2AAxmM7GMwYP5gYA4GBjm9gAOZ3O5zOGH+YGAOBwc5uYAB+fzufz99zmBgfmP38ZmAAfj45j8/fcZgYHxj8+GZgAAAIAAAAAAAAAAQAAAAAAAAAAAAAAAAAAAAAAAAAAAAAAAAAAAAAAAAAAAAAAAAAA=='
clean_count = 0
analog_min = 22000
analog_max = 51000
paddle_l_y_old = -1
paddle_r_y_old = -1
max_score = 10
ball_speed = 6
ball_width = 3
ball_height = 3
ball_half_height = ball_height >> 1
ball_x = 0
ball_y = 0
ball_vx = ball_speed
ball_vy = ball_speed
max_x = 128
max_y = 64
min_x = 0
min_y = 0
paddle_width = 3
paddle_height = 12
paddle_half_height = paddle_height >> 1
paddle_x = 128 - paddle_width
paddle_y = 30
paddle_speed = 5
net_width = 2
net_segmment_height = 5
net_segmment_gap = 3
l_score = 0
r_score = 0
last_up = time.ticks_ms()
buff = framebuf.FrameBuffer(bytearray(max_x*max_y),max_x,max_y,framebuf.MONO_HLSB)

def play_theme():
    notes = [[587,0.5],[523,0.5],[587,0.5],[0,0.5],[587,0.5],[523,0.5],[587,0.5],[0,0.5]
             ,[587,0.5],[523,0.5],[440,0.5],[523,0.5],[659,0.5],[523,0.5],[587,0.75]]
    for note in notes:
        speaker.duty_u16(int(65535/2))
        if note[0] == 0:
            speaker.duty_u16(0)
        else:
            speaker.freq(note[0])
        time.sleep(note[1])
    speaker.duty_u16(0)

def draw_net(d):
    y=0
    while y<max_y:
        d.fill_rect((max_x-net_width)>>1,y,net_width,net_segmment_height,1)
        y+=net_segmment_height + net_segmment_gap

def roundUp(x):
    return ((x+7)&(-8))

def dataToBuff(data):
    height = len(data)
    width = len(data[0])
    height = roundUp(height)
    width = roundUp(width)
    fbuf = framebuf.FrameBuffer(bytearray(int(width * height / 8)), width, height, framebuf.MONO_HLSB)
    for y, row in enumerate(data):
        for x, c in enumerate(row):
            fbuf.pixel(x,y,c)
    return fbuf

def customToBuff(data):
    width = data[0]
    height = data[1]
    fbuff = framebuf.FrameBuffer(data[2:],width,height, framebuf.MONO_HLSB)
    return fbuff

def show_large_logo():
    display.blit(logoLargeBuff, 0, 0)
    display.show()

"""
Change value of analog pin to y position
"""
def analog_to_y(analog_pin):
    analog = analog_pin.read_u16()
    if analog < analog_min:
        analog = analog_min
    if analog > analog_max:
        analog = analog_max
    analog = analog - analog_min
    analog = analog / (analog_max - analog_min)
    analog= int(analog * (max_y - paddle_height))
    return analog

def sound_miss():
    speaker.duty_u16(int(65535/2))
    speaker.freq(220)
    timer = machine.Timer()
    timer.init(freq=2, mode=machine.Timer.ONE_SHOT, callback=sound_off)

def sound_hit():
    speaker.duty_u16(int(65535/2))
    speaker.freq(440)
    timer = machine.Timer()
    timer.init(freq=20, mode=machine.Timer.ONE_SHOT, callback=sound_off)

def sound_bounce():
    speaker.duty_u16(int(65535/2))
    speaker.freq(330)
    timer = machine.Timer()
    timer.init(freq=20, mode=machine.Timer.ONE_SHOT, callback=sound_off)

def sound_off(timer):
    speaker.duty_u16(0)

def point_to(player):
    global l_score,r_score, mode
    sound_miss()
    if player == "left":
        l_score+=1
        buff.fill_rect(30,0,20,8,0)
        buff.text(str(l_score),30,0,1)
        if l_score == max_score:
            mode = mode_game_over
            buff.text("WIN!",17,30,1)
            display.blit(buff,0,0)
            display.show()
            time.sleep(0.5)
            play_theme()
    elif player == "right":
        r_score+=1
        buff.fill_rect(90,0,20,8,0)
        buff.text(str(r_score),90,0,1)
        if r_score == max_score:
            mode = mode_game_over
            buff.text("WIN!",83,30,1)
            display.blit(buff,0,0)
            display.show()
            time.sleep(0.5)
            play_theme()
    display.blit(buff,0,0)

def intro():
    global l_score, r_score
    display.fill(0)
    display.show()
    show_large_logo()
    time.sleep(1)
    display.fill(0)
    display.blit(logoPong, 0, 2)
    display.show()
    time.sleep(2.5)
    display.blit(logoPongI, 0, 2)
    display.show()
    time.sleep(3)
    buff.fill(0)
    l_score = 0
    r_score = 0
    draw_net(buff)
    buff.text(str(l_score),30,0,1)
    buff.text(str(r_score),90,0,1)
    display.blit(buff,0,0)
    clean_count = 0

def play_frame():
    global clean_count, paddle_l_y_old, paddle_r_y_old,ball_x,ball_y,ball_vx,ball_vy
    paddle_l_y = analog_to_y(analog_pin_left)
    paddle_r_y = analog_to_y(analog_pin_right)
    clean_count = (clean_count + 1) % 6
    if clean_count == 0:
        display.blit(buff,0,0)

    if paddle_l_y != paddle_l_y_old or clean_count == 0:
        display.fill_rect(0,paddle_l_y_old,paddle_width,paddle_height,0)
        display.fill_rect(0,paddle_l_y,paddle_width,paddle_height,1) #left paddle
        paddle_l_y_old = paddle_l_y

    if paddle_r_y != paddle_r_y_old or clean_count == 0:
        display.fill_rect(max_x - paddle_width,paddle_r_y_old,paddle_width,paddle_height,0)
        display.fill_rect(max_x - paddle_width,paddle_r_y,paddle_width,paddle_height,1) #left paddle
        paddle_r_y_old = paddle_r_y
    display.fill_rect(int(ball_x),int(ball_y),ball_width,ball_height,1)
    display.show()
    display.fill_rect(int(ball_x),int(ball_y),ball_width,ball_height,0)
    ball_x += ball_vx
    ball_y += ball_vy
    if ball_y > max_y - ball_height:
        sound_bounce()
        ball_vy = -ball_vy
        ball_y = max_y - ball_height
    elif ball_y < min_y:
        sound_bounce()
        ball_vy = -ball_vy
        ball_y = min_y
    if ball_x >= max_x - ball_width: #hit right paddle
        dy = (ball_y + ball_height) - paddle_r_y
        if dy > 0 and dy < paddle_height + ball_height:
            sound_hit()
            dy = dy / (paddle_height+ball_height)
            ball_x = max_x - ball_width
            angle = math.radians(90-60+dy*120)
            ball_vx = -math.sin(angle) * ball_speed
            ball_vy = -math.cos(angle) * ball_speed
            print("dy: ",dy, "vx: ", ball_vx)
        else:
            point_to("left")
            ball_x = max_x >> 1
            ball_y = max_y >> 1
            ball_vx = -ball_vx
    elif ball_x <= min_x + paddle_width:
        dy = (ball_y + ball_height) - paddle_l_y
        if dy > 0 and dy < paddle_height + ball_height:
            sound_hit()
            dy = dy / (paddle_height+ball_height)
            ball_x = min_x + paddle_width
            angle = math.radians(90-60+dy*120)
            ball_vx = math.sin(angle) * ball_speed
            ball_vy = -math.cos(angle) * ball_speed
        else:
            point_to("right")
            ball_x = max_x >> 1
            ball_y = max_y >> 1
            ball_vx = -ball_vx
    display.fill_rect(int(ball_x),int(ball_y),ball_width,ball_height,1)
    display.show()
    time.sleep(0.05)

logoSmallBuff = customToBuff(bytearray(base64.b64decode(logoSmallB)))
logoLargeBuff = customToBuff(bytearray(base64.b64decode(logoLargeB)))
logoPong = customToBuff(bytearray(base64.b64decode(logoPongB)))
logoPongI = customToBuff(bytearray(base64.b64decode(logoPongIB)))

while True:
    if mode == mode_playing:
        play_frame()
    elif mode == mode_init:
        intro()
        mode = mode_playing
    elif mode == mode_game_over:
        time.sleep(0.1)
        if play_button.value():
            intro()
            mode=mode_playing

